Spring snow is flittering outside my office window, and I am meticulously weighing gear, charting paths across topographical maps, and preparing for hiking the Colorado Trail this summer.
Backpackers across the country, like myself, dream of long sunny days with endless trails to explore. And they’re just around the corner. Before long, the thru-hiking and backpacking season will be upon us. And now is the time to get prepared. Now is the time to bust out that backpacking checklist.
The Colorado Trail is a 500-plus-mile trail that extends from Denver to Durango. It passes through high alpine terrain and is a great thru-hiking trail for beginners looking to try a shorter trail before tackling the longer Pacific Crest Trail or Appalachian Trail.
While those trails can take an entire season, the Colorado Trail can be done in anywhere from 4 to 6 weeks, depending on how fast of a hiker you are.
Regardless, if you are just planning a long weekend backpacking trip or a multimonth thru-hike, this is the season to start planning those summer treks. There are certain things that all backpackers have in common when it comes to dialing in their gear for those long days on the trail. A good backpack, tent, sleeping bag, and sleeping pad are all essential. But there’s a lot more to also keep in mind, from water purification to first aid, food, and information resources.
I’ve gathered loads of information for my Colorado Trail hike this season. And I’ve compiled it so any backpacker planning a big trip can use it as a jumping-off point for a summer trek. But it’s particularly useful for anyone considering thru-hiking the Colorado Trail yourself.
Backpacking Checklist: Gear to Get You Moving

While all backpackers will pack slightly differently for a multiday trip, there are always some staples that go into a pack. Some of the basic gear you will need for an overnight trip includes:
- Backpack
- Tent
- Sleeping bag/sleeping pad
- Footwear
- Water purification
- Stove
- Trekking poles
- Clothing
- Food
But before we get into all the sweet gear you’ll need, we should start with a scale and a little something called “base weight.”
What Does Your Pack Weigh?
There’s a sacred rule of thumb when it comes to loading gear into your bag. Your total pack should weigh no more than 20 percent of your body weight when fully loaded with gear, food, and water. I weigh 250 pounds, so my pack fully loaded should never be more than 50 pounds.

Calculating Base Weight
Base weight is the total weight of all of your gear minus food and water. The core three gear items — not including clothing — that make up your base weight are a backpack, tent, and sleep system (sleeping bag and pad).
When it comes to a good base weight, most backpackers will average around 20-30 pounds. A lightweight backpacker can get that down to 10-20 pounds. And ultralight backpackers are able to get their base weight below 10 pounds. To accomplish this, you have to start sacrificing some comforts on the trail.
My base weight for my thru-hike is 16.06 pounds.
Check out LighterPack.com to help dial in your gear. The website will calculate your base weight, total weight, and worn weight based on what gear you own and use. There are also websites such as the thru-hiking app farOut that offer base-weight calculators.
Or, you can weigh yourself on a scale without your gear, and weigh yourself a second time with your base gear. Then just calculate the difference.
Pick Your Base Gear Wisely
The Pack
Consider a lightweight pack that still supports the weight well. This year Osprey updated its fan-favorite Aether and Ariel 55 bags. They’re heavier than what I prefer to use, but they also offer a lot in terms of stability and durability on the trail. If you’re looking for an ultralight pack, I’d recommend checking out the Hyperlite Mountain Gear 2400 Southwest Pack — it’s got a 40L capacity and weighs in at just 1 pound, 14 ounces.
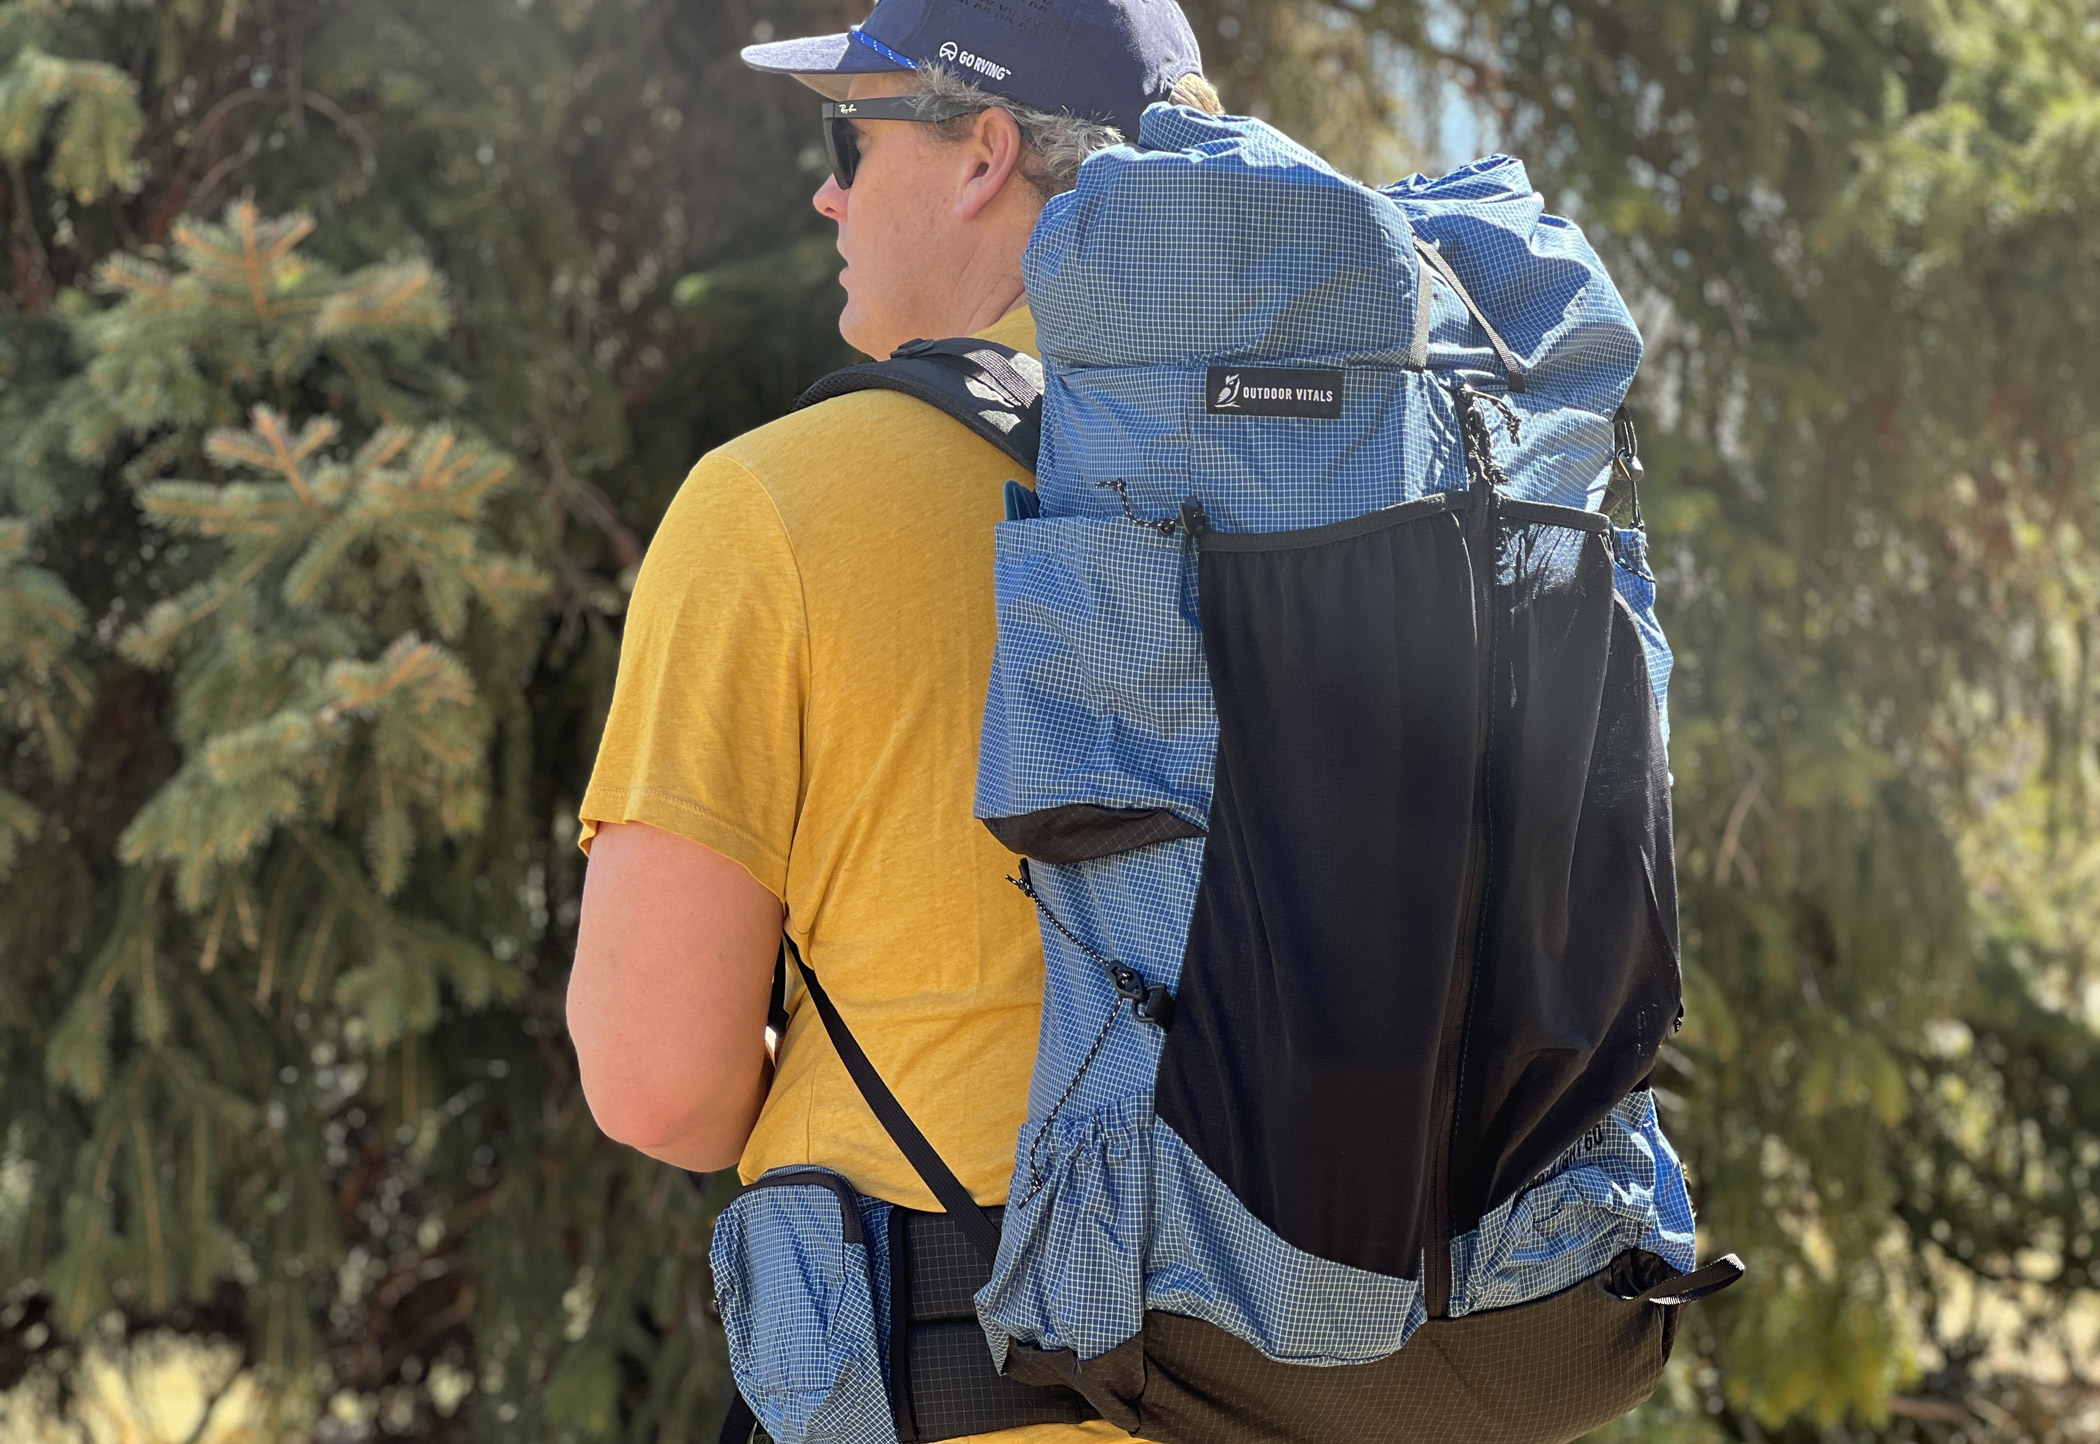
This season I am using the Outdoor Vitals Shadowlight Ultralight Backpack. The 60L pack weighs a mere 1 pound, 15.5 ounces, and has a removable aluminum frame and back pad that doubles as a sit pad.
The Tent
In addition to the pack, I’ve been using Outdoor Vitals‘ Fortius one-person trekking pole tent as well (pictured above). The entire tent weighs less than 2 pounds and packs down into a very small stuff sack taking up almost no room in the pack. While the tent is lightweight, it’s still easy to assemble. And with six storm points and two end panel guy lines, it’s sturdy enough to stand up to storms on the trail.
But if the Fortius doesn’t strike your fancy, check out GearJunkie’s best backpacking tents. Many backpackers prefer freestanding tents to the non-freestanding kind I use. Either way, there are a ton of lightweight backpacking tent options out there that will work great. Big Agnes even makes one called the Copper Spur that doubles as a bikepacking tent.
The Sleeping Bag
In terms of sleeping bags, there are down bags, synthetic bags, and top quilts. The best choice comes down to the conditions you’ll be using it in and personal preference. For the Colorado Trail, I’ll be using a Big Agnes Sidewinder bag. It’s equal parts warmth and comfort. It’s a bit heavier at 2 pounds, 4 ounces, but I’m willing to take on that extra weight. It’s a great bag.
Incredible backpacking sleeping bags are a dime a dozen. Eighteen made it onto our 2023 Best Backpacking Sleeping Bags roundup. Check out the Mountain Hardwear Phantom 15 or the Kelty Cosmic 20 for some other solid three-season options. And if you’re looking for the lightest, highest-quality bag from 2023, take a look at the Rab Mythic Ultra — that thing is a beast.

The Pad
The last major piece of gear is the sleeping pad. Some can be noisy, and some can be untrustworthy or uncomfortable. Having a comfy, quiet, reliable sleeping pad is essential for having a good time on any backpacking trail. Nothing will take the air out of your sails faster than a deflating sleeping pad.
A great new option for the season is the Therm-a-Rest NeoAir XLite NXT. It’s an ultralight pad at 12.5 ounces that stands 3 inches thick with a horizontal baffle for a comfortable night’s sleep. The Klymit Static V is another great option that’s new for 2023 and comes at an extremely affordable price ($55). Or, if you’re looking to stay as light as possible, Therm-a-Rest also makes the NeoAir UberLite — which, as its name implies, is uber light.
The Stove
These days there are lots of great backpacking stove options. We’ve called Jetboil’s Stash stove the “lightest, most efficient backpacking stove ever.” And we don’t make claims like that lightly.
But we’ve also got a list of 10 other canister and liquid-fuel stoves that were some of our favorites from last year. Highlights include the MSR PocketRocket Deluxe, which weighs just 2.9 ounces and will boil 1 L of water in 3 minutes, 23 seconds. Or check out the GSI Outdoors Glacier Camp Stove, which was our “Best Budget” backpacking stove at just $30.
Charging Electronics
In order to power your phone, rechargeable headlamps, or other electronics on the trail you need a battery charger. Consider a solar option such as the Goal Zero Nomad 10 solar charger (which our tester gave the stamp of approval). Or the Nitecore NB1000 Power Bank, weighing less than 6 ounces, is a great battery pack option.
The Loose Extras
Don’t forget all the accessories and extras that really round out your gear list. Here’s a quick list of what you might stuff in the brain of your bag:
- Sunscreen
- Sunglasses
- A brimmed hat
- A headlamp
- Trekking poles
- Water bottle/bladder
- Lighter/matches/flint
What’s For Breakfast, Lunch, and Dinner?

I recently asked a friend how she carried enough calories when she hiked the Pacific Crest Trail. Her answer was, “I didn’t.”
Hunger is a stark reality of any thru-hike. It’s hard to consume as many calories as you burn when you are walking 10-20 miles a day. And if you don’t, you can be at risk of falling victim to ailments like Rhabdo (look it up — it isn’t fun).
Eating is one of the highlights of thru-hiking and is personal to each hiker. Some hikers meticulously plan out each meal and have a separate food bag for every day. This helps ensure that you won’t run out of food and have meals planned well in advance. Other hikers will carry a week’s worth of food and select meals based on how they are feeling on any given day.
Regardless, it’s always good to have a solid selection of snacks on hand and ready to go. Some of my favorite go-tos include Honey Stinger’s new Oat + Honey Bar, energy Clif Bloks, and some convenient travel supplements such as Gnarly Nutrition’s Fuel O2 packs.
Prepackaged or Dehydrated Meals
Dehydrated camping meals are also easy, light, and pretty tasty these days. A friend who has hiked the Pacific Crest Trail and Appalachian Trail passed along some sound advice when it comes to these meals, though make sure you try them and like them before buying a bunch for the trail.
Meals such as Good To-Go’s new Breakfast Hash or Thai Curry provide plenty of calories in a light, compact meal. They are easy to cook as well. Simply add boiling water and wait.
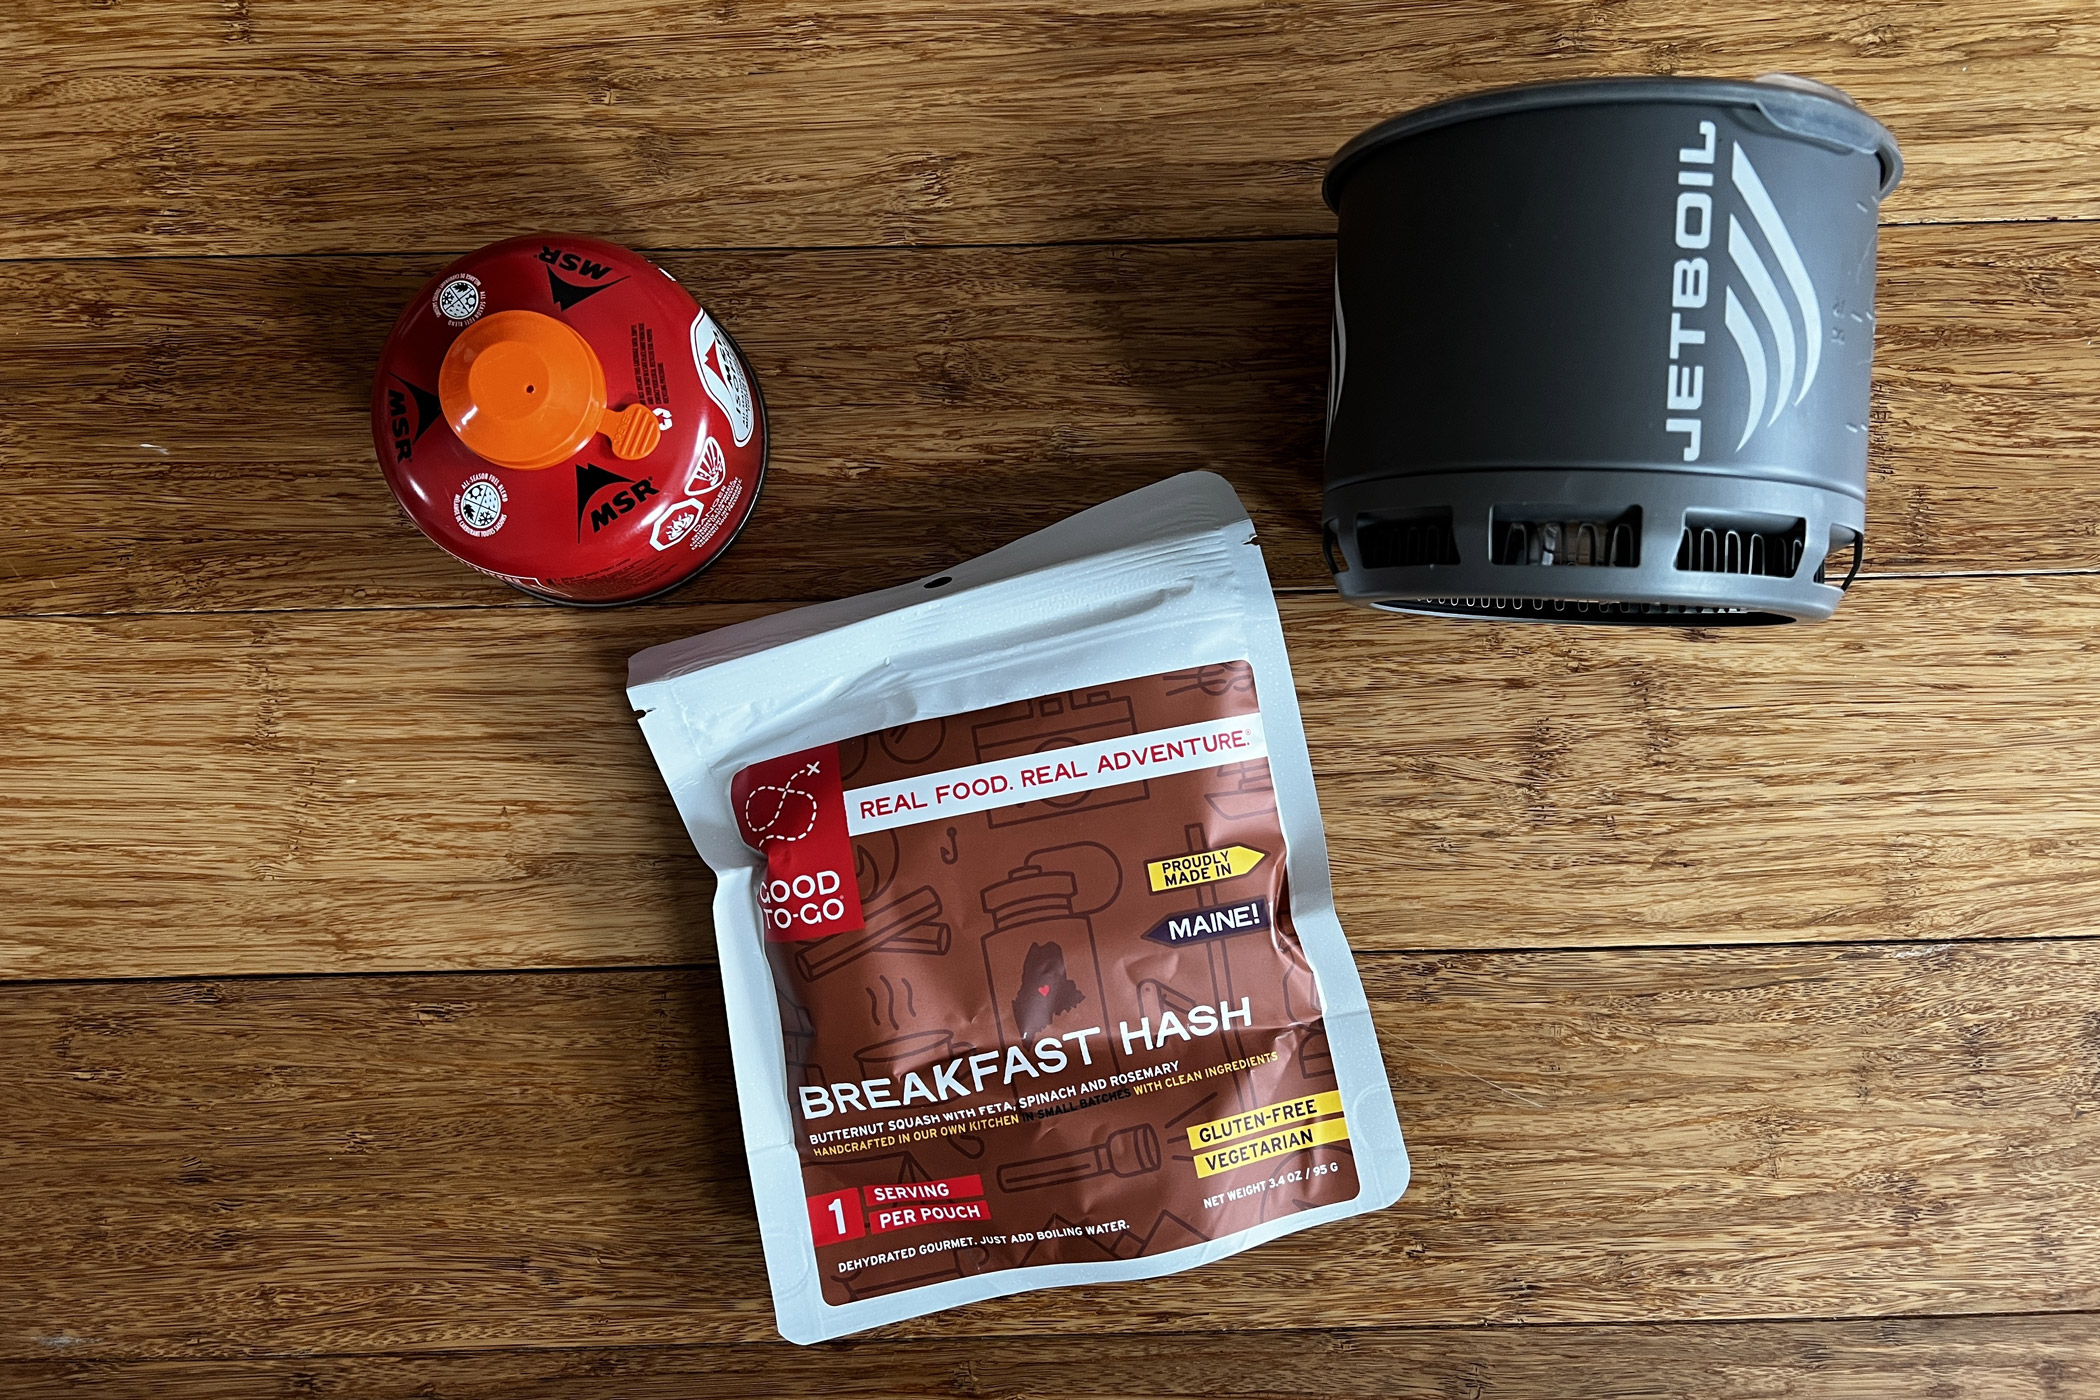
Keep in mind that the higher in elevation you are, the longer it will take to hydrate the meal. Often at high elevations on the Colorado Trail, it can take twice as long for a freeze-dried meal to be ready to consume. The drawback to prepackaged dehydrated meals? They’re typically more expensive and can get old if you’re eating them day in and day out.
Companies like RightOnTrek are also moving the needle on backpacking food, toward even tastier, more nutritious meals. Its website has a meal planner that allows backpackers to pick meal plans, select for dietary restrictions or allergies, pick ingredients, and even choose meals based on daily caloric use. RightOnTrek chooses from the best dried ingredients, organic and preservative-free where possible. And it tastes pretty damn good too.
DIY Meal Planning
It can also be fun to get creative with meal planning. You can get as elaborate with your food as you like. Fritos are a staple that is great to add to almost any backpacking meal. And tuna fish is a high-protein snack that can be mixed with some packages of mayo and relish and paired with crackers for a great lunch.
Peanut butter is one of my must-haves on any thru-hike. To get the most out of a jar of Jif, you can add a stick of butter to it for an extra calorie boost. Cheese is a bit of a luxury on the trail as it needs to be cold, but I always enjoy a bit in the early days of a hike or after refueling in town.
“Trail Magic” or “Trail Angels” are always a special treat to encounter on any thru-hike. That’s when some good-hearted, kind-natured soul will provide beers, soda, candy bars, fresh fruit, or other supplies for thru-hikers along the trail. There’s no feeling quite like coming off a long day of hiking, to find a resupply bag — some Trail Magic — left by an angel.
Access to Clean Water

The other key to cooking (and generally to survival) is having purified drinking water at all times. Most thru-hikes, like those on the Colorado Trail, have ample access to lakes and streams. But you need a good water purifier to drink the water.
A great lightweight option is the Platypus QuickDraw. This water-bottle filter weighs 3.3 ounces and will filter 3 L of water per minute. A great gravity option is the MSR Guardian Gravity Purifier. Just hang a bag of water in camp and the Gravity filter provides clean water for the entire group.
The Sawyer Squeeze and Katadyn BeFree also ranked high on GearJunkie’s list of Best Backpacking Water Filters.
Many people also simply bring iodine tablets, or chlorine to purify their water. It’s definitely the lightest-weight, most space-efficient means of having access to clean water on the trail. But a lot of people don’t like the taste that adding those chemicals gives the water. (If nothing else, it’s a good backup to a filter system to have on hand.)
Trip Planning: Designating Resupply Points
Once you have the gear, it’s time to plan the logistics of the hike. For any long-distance thru-hike, such as the Colorado Trail, planning a route and resupply points is key.
For the Colorado Trail, there are 33 segments to the trail. Each segment ranges in distance, but in theory, if you hike an average of a segment per day, the entire hike would take around a month. Some segments take more than a day to hike, and others less.
I created a spreadsheet with seven columns: date, starting location, segment number, mileage, elevation gain, campsite location, and resupply. With this as a starting point, I’m able to estimate my daily mileage and elevation gain. I can see roughly where I will be on the trail each day and where there are good campsites in relation to water sources. And using The Colorado Trail Databook and the official hiking guidebook (more on these below), I’m able to find locations where I can resupply.
Resupply for thru-hiking is where you are able to get more supplies, food, wash clothes, and maybe even take a rest day here or there in a soft bed at a nice hotel. Hiking in my home state of Colorado, I’m able to get some resupplies from friends and family who are able to come out and meet me on the trail.
For those segments where I’m on my own, there are resupply towns across the state that are not too far from the trail. Another great option is creating resupply boxes and mailing them to post offices in these towns. Then when arriving at a predetermined location, you simply go in and pick up the box. The Colorado Trail Foundation even offers a “CT Shuttlers List” of people willing to provide transportation on the trail to hikers.
Hold plans loosely. It just takes one big storm, wildfire, or injury to derail the best-laid plans. Sometimes you end up hiking faster than planned, and other times, slower. Either way, going with the flow is part of thru-hiking.
Resources
One of the best resources for any thru-hike is other hikers who have done the hike before. Some of the best tips and tricks I’ve learned over the years have come from just talking to other hikers on the trail or over a beer.
Even if you don’t know anyone personally who has hiked the trail before, technology makes it easy to discover a whole community of people who are more than willing to lend advice or insight. Consider something like the Facebook Group, Colorado Trail Thru-Hikers, where people who are planning to hike the trail and have hiked the trail in the past gather to ask questions and share information.

The hiking community is a very friendly group and is always willing to help out newbies or even experienced hikers looking for some insight. Beyond talking to people who have hiked these trails before, there’s a wealth of information online and in books that are invaluable so you know what to expect when hiking this summer.
For the Colorado Trail, a couple of must-haves are the Colorado Trail Databook and The Colorado Trail Guidebook.
Another great resource is apps such as farOut and onX, which allow you to put the entire trail in your pocket. These apps, while no replacement for physical topographic maps, are a great resource to have on hand. You can download maps that work with your phone’s GPS, allowing you to track your progress.
First-Aid and Safety
From blisters to sprained ankles, having a first-aid kit in the pack is a must. There is a range of great first-aid kits to choose from.
For backpacking, I tend to carry an Adventure Medical Kit for Hiking. It has everything I need for minor emergencies on the trail. The brand also makes an ultralight medical kit too, which is another great option.
Once you have a medical kit, make sure to keep it well stocked and know how to use it. Consider taking a wilderness first-aid or outdoor survival course. This way, you’re able to help yourself or others on the trail as needed.
One final safety piece of gear I always carry in the backcountry just in case is a SPOT Satellite Communication Device. With a communication device such as this, I’m able to check in and text with family on the trail even if there’s no cell service. In case of a major emergency, I can also use it to call for search and rescue. Some trekkers also consider getting medevac insurance to help in case they need to be airlifted off the trail.
The Final Word: Colorado Trail Backpacking Checklist

Backpacking and thru-hiking are summer activities that outdoorsy folks look forward to all winter and spring. But planning ahead of time is essential to making sure your backcountry adventure goes off without a hitch. Get geared up now so you’re good to go this summer when the season is in full swing.
Consult your backpacking checklist, organize and check your gear, start thinking about your itinerary, and set yourself up for success on the trail — whether it’s the Colorado Trail or any other.

