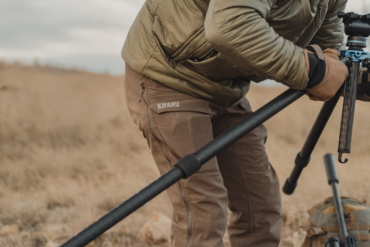
The best big game hunting is often far from the trailhead. But before you head out on a backpack hunt, you’ll want the right gear. Adventurer Andrew Skurka has you covered.

In a few hours my friend Steve I will leave for a wilderness area in Colorado’s GMU 521, at the headwaters of the North Fork of the Gunnison River, for a big game backpack hunt.
A backpack hunt can be considered a conventional backpacking trip, but with a rifle (or bow or muzzleloader) and the hope of filling a chest freezer with organic, free-range meat. On our hunt, we will have a mobile camp, and can remain out until our food bags are depleted. We packed light so we can comfortably cover big miles.
Backpack Hunting: Overview
I use the same clothing and equipment on a backpack hunt that I would on a low-intensity backpacking trip for the same location and season. Specifically, I carry puffy pants, a puffier jacket, and an upright canister stove. These are luxuries I might do without (or with lighter alternatives) on a more aerobic trip.
My hunting equipment can divided into three categories:
1. Before the shot. The bulk of most hunts are spent finding game. For that, optics and calls are helpful, if not necessary. For personal safety (and to follow the law), we also wear blaze orange clothing.
2. The shot. This is the easiest and simplest part. In Colorado, about three-fourths of hunters go home without taking one.
3. After the shot. The real work begins now. The animal must be field dressed and packed out. Without a horse or ATV, it’s a chore.
On my website I recently posted downloadable backpack hunt gear lists with my exact picks, weights, and retail costs. I’m not the most expert hunter, but have thousands of miles of remote backcountry experience. These lists are field-tested and are at least a starting point for those with less experience than me or a place for experts to find some new ideas.

The total weight of my pack is a hair less than 40 pounds: 4 days of food, a liter of water, and 13 pounds of hunting equipment, including my rifle. Worn clothing and footwear are not counted.
Before the Shot
Safety clothing (required). Per state hunting regulations, a blaze orange head covering and vest must be worn at all times. Inexpensive sets start around just $8, but spending more buys better quality and all-day comfort.
Optics (required). High-quality binoculars and spotting scopes are heavy (and expensive, with four-figure prices not uncommon). It would be ideal to have both, plus a tripod; but I only carry binoculars, which are the all-around better pick. Hunters must glass for hours each day, so it’s worth investing in a pair that is comfortable to hold and look through for extended periods. Look for magnification of about 10x.
Rangefinder (optional). The exact distance to a point can be accurately measured with a rangefinder. With this data, hunters predict bullet ballistics. For example, my rifle shoots 1 inch high at 100 yards, zero at 200 yards, and 6 inches low at 300 yards. With enough pre-season rangefinder practice, eyeballing it can be a viable alternative.
Calls (suggested). Earlier in the hunting season, during the rut and before heavy hunting pressure, calls are highly effective. During the third rifle season, not so much, but I take one anyway for a few special circumstances.
Complete “Before the Shot” Gear List

The Shot
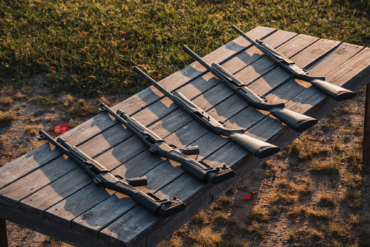
Rifle (required). Avid hunters are like avid skiers: they have a gun for every condition. But, personally, I have a single rifle that is appropriate for elk and mule deer, and that will withstand the cold, wet conditions typical of the Colorado Rockies in October and November.
It’s a mid-priced .308-caliber with a synthetic stock and stainless steel barrel. A .30-06 would be a good choice, too. Ammunition in both is ubiquitous.
Scope (required). Again, you can spend a lot of money. You get what you pay for, but not proportionally, i.e. a $1,600 scope is not four times better than my $400 scope. The magnification range should reflect the hunting terrain. Mine is 3-9x, which is suitable for thick timber and longer shots across meadows and tundra.
Ammunition (required). Shot placement is more important than ammunition. Even so, I use a quality hunting round that is designed for consistent penetration and expansion. Lead-free ammo is recommended, both for personal safety and for the sake of wild animals that eat carcass scraps later.
Supports (optional). Use rifle supports to minimize barrel shake — which is likely when brown is in the crosshairs. Some attach directly to the stock; others are independent. I want more firsthand experience before I invest in this item. In the meantime, I hope to shoot prone, which is the steadiest shooting position. If not, I rigged a system to use my trekking poles as shooting sticks. A nylon sling provides some stability while shooting offhand.

After the Shot
Marking tape (suggested). If an animal runs after being shot — especially into thick brush or just before nightfall, with snow-free ground — tracking can be a challenge. Bring 30 feet of colorful tape to mark evidence of its path. In a pinch, toilet paper works well to mark blood trails; just hang small strands on tree branches along the way. Pick it up after the animal is recovered.
Cutting tools (required). It sounds improbable, but a small knife is all you need to field dress an entire elk. Seriously, watch Fred Eichler do it in less than 10 minutes. I use a folding knife with a 3.5-inch replaceable blade. It provides a razor edge without sharpening. To reduce pack-out weights, I debone the quarters, using the same knife (and maybe a new blade).
Nitrile gloves (suggested). Field dressing is cleaner than you might think, but hands still get covered in blood, hair, and body tissue. I prefer gloves so that I can easily peel off the mess.
Game bags (critical). The meat should be stored in breathable bags to cool, stay clean, and remain protected from insects. An elk will fill about four 60-inch commercial game bags. As a cheap alternative, use old pillowcases.
Backcountry storage (depends). Steve and I both have tags, and if we get an animal early we will probably continue the hunt. To store it, we will hang it with cordage. Learn beforehand about bear activity in the hunting area.
Pack out (suggested). I would advise against putting bloody meat bags directly inside a backpack. Instead, put the bags inside 2-mm trash compactor bags, to prevent contact with the pack and other gear. Once the snow is deep enough, a durable utility sled is a safer and more efficient method of transporting meat than a backpack.
Complete “After the Shot” Gear List


