Want to get started in backcountry skiing? This is the backcountry ski gear you need.
Around November every year, I get dozens of emails and personal questions from new backcountry skiers. “What should I buy to ski in the backcountry?” they ask. So instead of answering it over and again, I decided it was time to break it down in a single article.
This is my best attempt to give you, the new backcountry skier, some direction in what to buy. There are often many choices in each product category, but I’ll drop a few of my favorites to save you time shopping.

Gear to Start Backcountry Skiing: Avalanche Gear
Before we get started, a warning: backcountry skiing is dangerous, and avalanches are real. Don’t even move on to the rest of the list until you nail down your avalanche kit. Your friends, family, and loved ones want you alive, and so do I. Please, take avalanches seriously.

Mandatory avalanche gear includes a beacon, probe, and shovel. While instruction is beyond the scope of this article, here’s a quick rundown of each component that you should have (and know how to use).
For a beacon, choose a new model from a reputable brand. While there are several good beacons from Otrovox, BCA, Mammut, and others, I’d recommend one model for simplicity — the BCA Tracker 2. It’s simple to use, effective, and it’s the best-selling beacon in North America. Most skiers are familiar with the Tracker 2 already. It’s a solid choice at a good price (about $285).
Your probe is used to precisely locate a buried skier after a beacon search. Your probe should be a minimum of 2 m in length — the most common probes on the market are between 240 and 300 cm. Learn how to assemble yours instantly in a safe, low-pressure environment like your backyard before heading out into backcountry terrain.
Finally, you’ll need a portable shovel. Get a shovel specifically designed for avalanche rescue, and make sure it’s metal. You’ll use this in digging pits to check snow layers. You’ll also use it for chores around winter camps, so get a good one.

Don’t want to shop around? The BCA kit pictured above has everything you need in one package for $365. It’s a great package that will serve the needs of most backcountry skiers.
Backcountry Ski Boots
You’ve got your avi kit; great! The next thing to focus on is boots. More than just the connection to your skis, good boots can make or break your day.
First and foremost, choose boots that fit perfectly. This is the realm of a good boot-fitter. If at all possible, find a local shop and try on a bunch of pairs with an expert fitter. If you are spending a long day going up and down mountains, the last thing you want is a blister or hotspot.
Beyond fit, there are a few key attributes to backcountry ski boots.

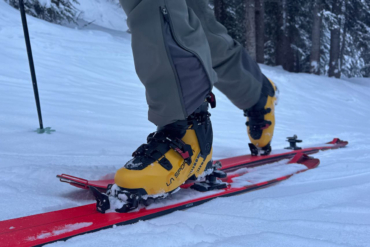
How do they attach to skis? Most backcountry ski boots these days use pintech fittings. These look like two metal holes in the toe of the boot. The pins of pintech bindings slide into these holes to attach your boot to the ski.
A few models of side-country boots may not have pintech fittings, but I’d highly recommend getting boots with pintech fittings even if you may not use pin bindings. They are more versatile, and you never know when you may use rental bindings.

Second, some boots have only pintech fittings and no lip to connect with alpine-style bindings. For those boots, you’ll be limited to riding only pintech bindings, so it’s something to consider.
My favorite backcountry ski boots (the SCARPA Maestrale, Salomon MTN Lab, Fischer Ranger Free, and Dynafit Hoji Free lines) all have both pins and compatibility with tour-style frame bindings.

A few other attributes to look for: How much range of motion do the boots give you in walk mode? How stiff are the boots? And how much do they weigh?
Backcountry ski boots are expensive, but this isn’t a place to skimp (if possible). You can expect to use them for several years if you don’t ride every day.
Backcountry Ski Bindings
Bindings and their compatibility with your boots is a bit of a complicated issue.

I already touched on pintech bindings above. For many years, they’ve been the standard in backcountry skiing. If you will mostly use your skis for backcountry skiing and don’t plan to take them inbounds much, two great choices are the Dynafit Radical or G3 Ion ski binding. Either will do the job well and both are very light, which is important when you’re skinning uphill.
If you plan to ride very aggressively, you may want to consider freeride-oriented bindings like the Salomon Shift. These weigh a bit more but have the benefit of a true DIN-certified release mechanism. They also work well if you plan to ride in resort terrain with the same pair of skis.
Whatever you choose, be 100% certain that the bindings and boots are compatible.

Skis
Why did I put skis so far down the list? Well, if you’re just getting started, they are less important than boots, bindings, and avalanche equipment. Frankly, pretty much any all-mountain downhill ski will do the trick.
So if your budget is thin, this is the place I’d consider skimping a little. You can get many used skis that will do just fine in the backcountry. Remember, most of the time you’ll be climbing uphill, so the performance won’t be as critical. Plus, you can always upgrade your skis next season if you have good boots and bindings.

But, let’s dream a little! What you really want is a light, versatile ski that can handle everything from chundery sastrugi to blower pow. That’s because you don’t have a quiver. Yet.
For your first backcountry skis, look to a versatile pair that you could ride anywhere in a ski resort in any weather conditions.
I like fairly wide skis. My current favorites in the lineup? The Fischer Hannibal 96, G3 FINDr 102, and Salomon QST 106. All three would be a good choice, with the Fischer being the quickest and lightest, while the Salomon is the most stable at speed.
I’m not going to go down the ski rabbit hole, as there are a billion ski reviews online. Find some used ones or a well-regarded model that’s a few years old, and go rip it up.
Skins
While skis get all the glory, skins do most of the grunt work. And boy, a bad pair of skins will wreck your day.
The first thing to know when buying new skins is how they attach to your skis. If they use clips (most G3 models do), they’ll fit pretty much any ski.
But some skins (Dynafit, Volkl) have pins that slide through a hole in the nose of the ski or another specific attachment method that makes them only work with certain skis. Make sure yours will be compatible.

The next things to consider are length and width. You want them to fit, obviously, so make sure they are wider than your skis before you buy them. You’ll use a tool included in the package to cut them to the size of your ski.
Which ones should you get? Personally, I’ve had the best luck with G3 Alpinist skins over the years. There is a wide variety of levels of traction, and those made with nylon plush tending to grip better on uphills. Models with mohair surfaces usually provide better glide, and you can even get a blend of mohair and nylon.
But for me (and most people who focus on accessing downhill terrain), the glide is a secondary consideration. When going uphill, you want grip uphill more than anything, and you want glue that will work all day long.
I’ve also had good luck with skins from Pomoca, but my top choice remains G3.
Backpack
If you’re just getting started backcountry skiing, start the search for a backpack in your closet. If you hike or climb, you likely have one that will work already. The main criteria for a backpack are that it carries your avalanche kit in a readily accessible location, along with carrying a little food, water, emergency tools, and clothing layers.
But first and foremost, it carries your shovel and probe. You need to be able to access these in seconds, so it’s best if there is a second compartment for these tools. If not, be cautious when packing — that the probe and shovel must remain accessible at all times.
If you’re shopping for a backcountry ski pack, there are myriad options online.
Of course, avalanche airbags are a great step up for backcountry skiers. These packs contain airbags that inflate nearly instantly upon pulling a triggering lever or handle. They are quite valuable if you will be in avalanche terrain often and add an extra level of safety.
Some guide services and resorts in Europe even require them. But avi airbags are a big investment, so many skiers forego them initially. While they aren’t considered mandatory gear for most people in North America yet, they are becoming more and more common.
So if you plan to get seriously into backcountry skiing, start saving your pennies for this potentially life-saving piece of kit.
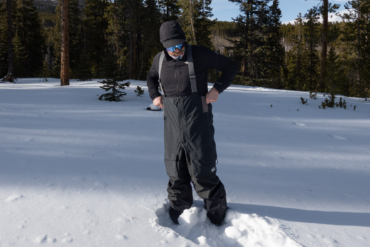
Apparel
If you’re going backcountry skiing, I really hope you already know how to ski — and how to dress for skiing.
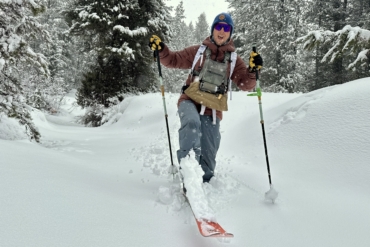
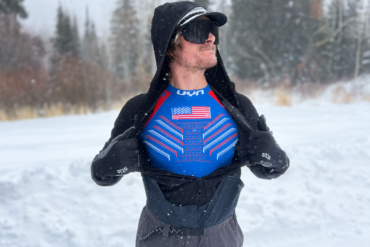
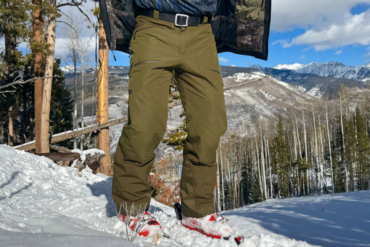
But one big difference in the backcountry is you’ll be working hard most of the time. As with most aerobic activities, dress in several light layers. My typical outfit includes merino wool base layers, socks, a fleece mid-layer on top, shell pants and jacket, neck gaiter/BUFF, goggles, warm hat, trucker-style brimmed hat (for the sun), gloves, and a puffy jacket in my pack.
Most likely, you own apparel that will work great. Just beware of highly insulated ski parkas and pants, as they’ll have you sweating up a storm on the uphill.
Beginner Backcountry Ski Gear: The Extras
That’s pretty much the kit, but there are a few more things that most people carry along for safety and comfort.
Ski straps: These can fix all kinds of broken stuff in the field.
Multitool: Ditto. Broken binding, pole, sunglasses, or whatever — a multitool like a Leatherman can save the day.
First-aid kit: Bring a few Band-Aids, sunscreen, and maybe some ibuprofen. For serious injuries, your top priority will be an evacuation.
Emergency blanket: Because you may need to go for help to evacuate a friend, an emergency blanket can help keep them warm while they wait.
Water bottle and food: Yes, bring water and food. You’re going to be working hard out there!
Avalanche Course!
While not a piece of gear, this piece of advice is not to be ignored. Avalanches are real. That’s why I’m beginning and ending this article talking about them.

I highly, highly recommend taking an avalanche course from a qualified instructor. You will learn not only to be safer in the mountains, but also learn about the weather, terrain, and snowpack. Trust me, you will enjoy each outing more.
Organizations like AIARE and the National Ski Patrol offer them, and REI and local outfitters offer awareness courses as well. For a few hundred bucks, the avalanche course should be very high on your priority list.
Now, get out there and enjoy those turns. There’s nothing sweeter than a powder turn that you earned every step of the way.