Learn how to wax your skis and snowboards after a full season of riding with our handy guide. For optimal performance, don’t let your skis sit unwaxed in your basement until next season!

Your skis and snowboard bases are like a cast iron skillet. Use that skillet infrequently, don’t take care of it, and your next piece of French toast will be shredded and stuck to the pan. Use the skillet frequently, making sure to wash, dry, and oil it, and it will be slicker than Teflon. Your board’s bases are no different.
Frequent waxing throughout the season will result in boards that perform more predictably (especially in sticky, wet snow). End-of-season waxing allows your boards to bask all summer in an environment that will boost their performance next season.
Neglect your bases, and your experience will end up like French toast in a sketchy skillet – chundered.
You can do most off-season maintenance of skis and boards from home. Read on for our do-it-yourself guide on ski and snowboard waxing and care.
Last Day Skiing: Wax Ready?
After your last day, assess the overall condition of your bases. If the bases have a flat and gray appearance in places, it indicates they’re dried out and require professional attention.
“When a ski dries out, it means the pores are closing, which is compressing the base. The only way to fix that is to grind off the top layer,” claims Wes Price of Wintersteiger.
“The amount of material removed is very small, about 0.03 millimeters on an average grind. This is over 100 passes on a stone!” said Price.
If in doubt, have them stone ground. But knowing your technician’s level of mastery and the condition of their equipment can help you guess at the quality of the final results.
Once you have assessed that your bases are wax ready, or after they’ve been stone ground, it’s time to wax.
How to Wax Your Bases
For waxing, you need an iron, a scraper, and a 60-gram stick of base prep or storage wax. Even if your shop has put an end-of-season tune on your skis, the application of storage wax is prudent. If you wax frequently, the purchase of a waxing iron designed specifically for the task is well worth considering.

Modern ski bases are essentially random assortments of crystals. The spaces between those crystals are open areas, or amorphous zones. Your task is to saturate the amorphous zones with base prep or storage wax.
This conditions your bases to accept running wax, which saturates deeply into your bases, next season. It provides more than a surface-level application that would be skied off quickly.
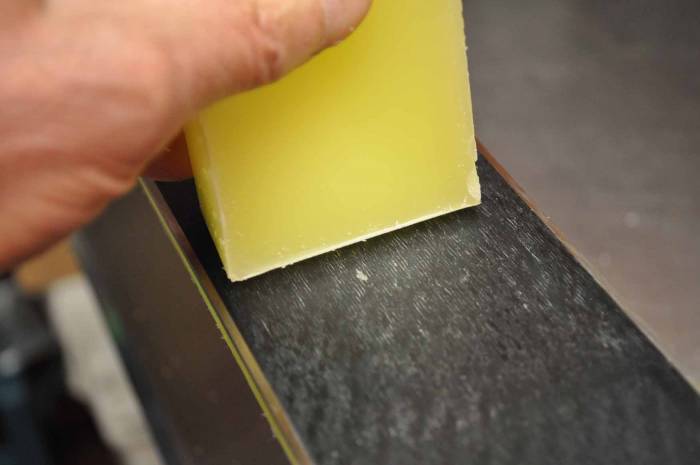
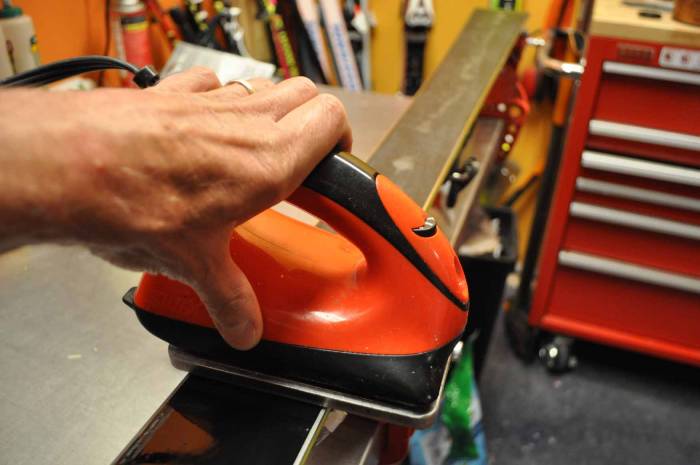
To conserve wax, I usually crayon it on and then add a few additional drips from a hot iron. Iron the wax in with a smooth, continuous motion from tip to tail, always keeping the iron moving.

Is the wax smoking? Then your iron is too hot, which is an indicator that you risk compromising the structural integrity of your boards.
Take three passes of the iron, adding wax if you do not have a healthy layer of liquid wax underneath the iron.
‘Hot Scraping’ Wax Off Bases
Late-season snow is a cesspool of contaminants for your bases. Snowmaking, grooming, snowmobiles, and other resort devices dump petroleum on the snow all season long.
In the backcountry, pollen and dust brought in from hundreds of miles away by strong winds accumulate in the snowpack. As rising spring temperatures decrease snowpack, the concentration of contaminants becomes greater, which affects your bases.

To clean your bases, I suggest “hot scraping.” Immediately after the first application of wax, and while the wax is still liquid or soft, scrape it off. Let the skis completely cool for two hours or more at room temp.
Once cool, scrape again with a recently sharpened scraper. This process will lift off the first layer of base prep wax and the majority of contaminants. If my skis are particularly nasty, I might do this twice. I do this frequently during the season.
Wax Off, Wax On
After hot scraping, apply another layer just like the first, taking three passes of the iron. This time, instead of hot scraping, let the wax cool at room temperature.

Don’t rush this step. If you put your skis outside on a cold day after hot waxing, the temperature will rapidly contract the bases. And the wax will squeeze out of the amorphous zones, thus defeating the purpose of hot waxing.
At this point, you can let your skis cool and call it a day. But if you’re a perfectionist, take an extra hot scraping pass. Or, let that last pass cool, then scrape the wax completely off and take another pass. The extra step will make your boards that much more efficient come next season.
By now, most of us are skiing and riding over brown snow, rocks, and roots. I get that you’re thinking about spring activities. However, a bit of quality time at the tuning bench will yield skis that perform predictably next year in a wide variety of conditions.
About the author: Marty Grabijas is a PSIA Alpine Instructor, former racer-chaser ski tech, and retired product developer from the outdoor industry.


