In spring 2021, photographer, filmmaker, and backcountry snowboarding maven Nick Cahill set out on a mission to splitboard up 12 volcanoes across the American Northwest and ride down them in less than 30 days.
There’s no better tune than summit silence. Stillness, accompanied by the hush of wind and the drum of a hard-beating heart — it’s an orchestra that only plays when earned through grit, sweat, and legs on fire.
“ROOOOOOCK!!!” Cut the music. My partners are hollering above me. The walls corralling me in this narrow gully beneath Lassen Peak begin to rumble. The first and smallest summit of 12 volcanoes our team seeks to conquer in the next 30 days, and already, rockfall.
I spin around to spot a pitbull-sized boulder bounding directly toward me. Suddenly our plan to downclimb this steep, chossy corridor feels foolish. My footing in the mixture of rock, ice, and snow was precarious enough without basalt cannonballs hurling at my head.
With my snowboard in hand, I dig its edge into the snow above me to gain purchase and quickly sidestep toward the gully’s southern wall, kicking my toes into the icy slope. Bracing for impact, I wonder briefly if, while hurling through thin air, I’ll still enjoy that outer-body DMT trip that people say happens when you die.
I’m about to find out when — with one lucky bounce — the boulder takes flight and careens past me so close I feel its whoosh through the open vents of my jacket.
So it begins — day one of the Ring of Fire.
Snowboarding the Ring of Fire: The Mission
Back to the mission at hand — 4,000 vertical feet of sweet, spring slush waiting to be carved into infinity symbols. We didn’t get up at 4:30 a.m. and skin/boot-pack 6 miles, only to let a slight brush with catastrophe spoil the winnings. We’ll debrief the rockfall, and other sketchy lessons of the day, when we arrive safely at the bottom. Not before one of the best runs of the season.
Screw it — let’s go snowboarding.
Rewind to winter 2020 when that same sentiment hit Tahoe-based snowboarder, filmer, and leader of the Ring of Fire expedition, Nick Cahill, like a probe prodding through an avalanche. As chairlifts halted at every resort in town courtesy of the global pandemic, Cahill conjured up a silver lining to his snowboarding woes.
His plan was to splitboard up as many volcanoes as possible across the American Northwest within a 30-day span, snowboard down them, and film the entire journey for a documentary film.
After recruiting two capable teammates — Tahoe-based snowboarding filmer/photographer, Danny Kern, and splitboard guide, Tailer Spinney — Cahill loaded up his 1988 converted school bus with boards, gear, and cameras, and on May 6, 2021, the team set out for Mount Lassen.
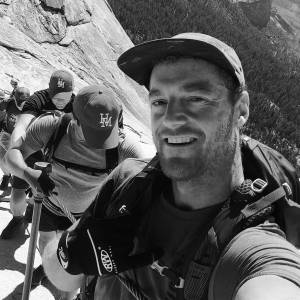
A small handful of friends, me included, joined to support them for the first summit. Hence my involvement in the rockfall incident.
Thirty days (and a few close calls) later, Cahill topped out on Mt. Baker, the 12th and final peak of the tour. Their team had splitboarded up a combined 65,000 vertical feet, snowboarded down an equal amount, and captured the entire odyssey with GoPros and a RED cam.
A year later, their eight-part film series, Ring of Fire, was released on Teton Gravity Network.
See Episode 1 for the rockfall incident, and below for the team’s top picks in gear that got them to the finish.
Splitboarding the Ring of Fire: Essential Gear Used
A 2-Person, 4-Season Tent

Nick’s Pick: Big Agnes Shield 2 ($700)
With the added objective of filming, a fair amount of delicate gear came with us to every summit, and for overnights, I like to keep it warm and dry in my tent. For that reason, carrying a two-person tent just for myself is worth its added weight.
Aside from camera gear, I need to be able to hang dry gear in the tent (or risk it freezing), and even a two-man tent fills up quickly around makeshift clotheslines.
For this trip, I carried the Big Agnes Shield 2, a stout two-person tent constructed with an ultralight, three-layer waterproof, breathable nylon. The shell has a microporous membrane and a tricot layer that helps manage moisture, so condensation was not a problem for me.
And while I didn’t suffer any brutal snowstorms under it, I was plenty warm inside at 10k feet on Mt. Rainier, and the structure stood strong through nights of 20+ mph wind. I also loved being able to catch the sunsets through its clear window.
Check Availability at Big Agnes-40˚F Waterproof Down Sleeping Bag

Danny’s Pick: Sea to Summit – Alpine Down Winter Bag (-5°F & -40°F): ($649-899)
I spent more than a few sub-zero nights sleeping on top of the bus, and each time I woke up to find my sleeping bag covered in frost.
Usually, these kinds of conditions would soak a down bag by morning, but I couldn’t sacrifice the warmth, so I needed a down bag that could withstand the morning melt. I used the Sea to Summit Alpine -40F and was blown away by its relentless moisture-wicking ability. It remained completely dry and toasty inside, every night.
Another key factor is packability, and the Alpine’s Ultra-Dry Down 850+ loft stuffed easily into its compression sack, which packs about the size of a basketball. Moreover, the oversized footbox allowed plenty of space for boot liners and other outerwear, mandatory for the overnights and alpine starts.
Check Price at Sea to Summit40-50L Alpine Backpack With Ski Carry

Tailer’s Pick: Gregory’s Targhee FT 45 ($249)
Carrying camera gear, climbing gear, avalanche safety gear, splitboarding gear, and summit beers called for a roomy backpack. As a smaller human, I needed a pack that could haul bulk (something in the 40-50L range) without feeling clunky, and I also wanted something with smart compartmentalization.
Gregory’s Targhee FT 45 had that combo and then some — it’s lightweight, spacious, and offers good organization for avalanche gear with a separate compartment plus probe and shovel sleeves.
The Targhee has a “Fast Track Ski Carry” feature that enables you to mount skis without taking off the pack, but it’s designed for skis, not split skis (the bindings don’t jive), so I didn’t use it much.
On the uphill with my board mounted in a solid configuration, the Targhee’s side-zipper entrance made for easy access to my gear on the go. But my favorite part of this pack is the super-secure buckle system. It’s easy to open even with big gloves on.
Check Price at AmazonCheck Price at Backcountry
A Lightweight, All-Mountain Splitboard

Tailer’s Pick: United Shapes Covert ($895)
With so much vert to cover on this trip, weight was a big consideration in my split setup. But more importantly, I needed an all-conditions board that I felt comfortable on in the steeps.
I also really enjoy supporting local board makers, and United Shapes is a core snowboard company designed by Lake Tahoe local Gray Thompson with an emphasis on maximizing downhill performance in variable backcountry terrain.
Danny and I both rode the United Shapes Covert, which hit the market circa 2016 and is being redeveloped for next season. We’re obsessed with its balance in flex and rigidity, which allows for surfy turns through soft snow and solid edge control on firm snow.
The Covert has positive camber with a lot of taper from the nose through the tail, which really helps with flow between turns. It’s constructed out of poplar, paulownia, and bamboo, which makes it super lightweight. Plus, I always love to support a local business on the rise.
I’m looking forward to what comes next from United Shapes — the brand is redeveloping and expanding its board line for the coming seasons.
Check Price at evoLightweight, Easy-to-Adjust Splitboard Bindings

Tailer’s Pick: Spark R&D Arc Pro Splitboard Bindings ($540)
The key word here: lightweight. Splitboards are made with a range of materials — wood, fiberglass, carbon fiber, etc. — but the reality is there’s only so much weight you can shave from the board itself.
For the lightness factor of my split rig, I tend to focus more on my bindings, since some are considerably lighter than others. On this trip, our whole crew opted for the Spark R&D Arc Pro Splitboard Bindings — some of the lightest splitboard bindings out there, but also some of the most durable.
I had the women’s model (the only difference being the sizing range), which weighs just 1 pound, 5.6 ounces each. The baseplate cutouts make the binding even lighter and give the user the ability to adjust stance or tighten hardware on the go, without sliding the bindings off the pucks.
The Arc Pro is ridiculously easy to adjust on the fly, which is the real selling point for me.
Check Men’s Price at evoCheck Women’s Price at evo
Grippy (But Not Sticky) Skins

Nick’s Pick: Pomoca Free Pro 2.0 ($230)
My skins were a few years old going into this trip, and since they’re literally the last connection between my feet and the snow, I decided to invest in a fresh set.
Our local shop recommended the Pomoca Free Pro 2.0s because of their glide, grip, and weight — all important pieces of the puzzle for splitboard mountaineering, the grip being the biggest factor for me.
On volcanos in the spring, we often go from fully frozen ice to corn snow in a matter of hours and need to be surefooted on all of it. The Free Pro gripped to terrain flawlessly for me and also dried quickly after soggy slogs.
Another huge positive of the Free Pro 2.0s is their stick — they cling tight to the bottom of my board but don’t leave glue behind to stall me up on the downhill.
Check Price at evoCheck Price at Amazon
Merino Wool Sun Hoodie

Nick’s Pick: Ridge Merino Solstice Sun Hoodie ($80)
This was undisputedly the most worn clothing item for each of our crew members. It’s such a versatile piece of gear. It works as a cozy midlayer, a sun-shielding outer layer on hot days, and even a base layer since merino is so good at handling sweat.
Ridge Merino, a local brand out of Mammoth Lakes that sustainably sources all its materials, helped support our mission and outfitted our whole team with the Ridge Merino Solstice Sun hoodie, an exceptionally well-constructed merino wool midlayer.
It offers a UPF of 30+ at altitude, it’s magnificently breathable, and its ability to wick moisture is bar none, as for its quickness to dry when wet.
For a team with minimal access to laundry, the real magic of a good merino wool garment is in how well it repels body odor. After long days climbing volcanoes in the sun, we were all pretty ripe. Somehow, my Solstice never seemed to stink!
Check Price at Ridge MerinoLightweight, High-Contrast Glacier Glasses

Nick’s Pick: Oakley Clifden ($211)
No one wants to wear goggles uphill (they’re hot and uncomfortable, and they fog up) but for 10+ hour days on snow and in sun, goggle-like eye protection is a must. Glacier glasses — that is, sunglasses with shields that block out peripheral sunlight — are the answer for mountaineering, and for us, they don’t get better than the Oakley Clifden.
A veritable industry standard for uphill eyewear, the Clifden has a perfect tint for glaciers and snow-covered volcanos, which provides exceptional contrast in flat lighting. Tailer and I both wore these for the Ring of Fire, but with different lenses.
Tailer found that her Prizm Snow Torch lenses lent crisp, clear definition when the light went flat; and mine, the Prizm Snow Black Iridium, protected my eyes wonderfully under the midday sun.
Beyond the lenses, the integrated leash was my favorite feature, since I was able to pull them off and look through my camera by dropping them around my neck. They’re also convertible, with removable side and nose pieces. I wear them as regular sunnies off the mountain.
Check Price at REICheck Price at evo
A Stoke-Infusing Morning Jump Starter

Danny’s Pick: MUD/WTR ($60)
For most people it’s coffee, but our team wasn’t huge on caffeine. We’re only human, though, and like anyone else, we needed something to get us going strong in the mornings. MUD/WTR is a delicious coffee alternative made of a blend of medicinal mushrooms and herbs, as well as chai, turmeric, and other adaptogens.
It’s great for a morning pick-me-up, and despite only having a fraction of the caffeine that coffee does, it provides clean, long-lasting energy that seriously enhances an alpine start.
The 100% organic ingredients are known to support memory, focus, inflammation, and your immune system, all welcome attributes for a tired mountaineer. We usually just mixed it with hot water, but it also goes well in a cup of joe.
And let’s not forget about digestion. MUD/WTR aids the morning ritual in more ways than one!
Check Availability at AmazonBiodegradable Body Wash

Nick’s Pick: Slab Soap ($7)
Hotel rooms were not in our budget, or interest for that matter, and maintaining hygiene for 30 days without showers required opportunistic bathing. That is, bathing in streams, lakes, snowmelt — whatever fresh water we could find along the way.
To stay clean without hurting the environment that cleaned us, we needed a heavy-duty natural wash solution that’d cut through nature’s grime without damaging it. Slab Soap, a small, sustainably minded brand out of Oregon, had just the remedy.
Its soaps are made with natural ingredients that are fully biodegradable, and it doesn’t use plastic in its packaging. It also smells great and doesn’t leave your body feeling dry or oily. Unfortunately, it doesn’t help much with the cold, though … we washed in glacial runoff on more than one occasion.
Check Price at Slab Soap