Beyond the “big three” — backpack, tent, and sleeping bag — there’s a lot of gear you might think you need for your next long trail, and the cost of things can really add up.
If you’re wondering what you’ll use and if it’s worth the weight or cost, here’s some gear that I used every day on my thru-hike of the Appalachian Trail this past year — and all of it is under $75. Most of the items have their own full reviews on GearJunkie and many are included in different categories of our Best of 2023 roundups. So you can rest easy knowing they’ve all been thoroughly tested across multiple trails and adventures.
I remember going to an outdoor store before my thru-hike in 2018 and being shown a wide variety of accessories that I ended up buying and didn’t end up using. We want you to avoid that situation. So, after thousands of miles of trail testing, this is the budget-friendly thru-hiking gear I’d 100% recommend.
Budget-Friendly Thru-Hiking Gear
Hyperlite Mountain Gear REpack Freezer Bag Cook System

I used the Hyperlite Mountain Gear REpack Freezer Bag Cook System ($49) for every hot meal I made while thru-hiking. So I’d say this 1.5-ounce item was definitely worth carrying. It’s made of DCF 11 + 3M Thinsulate Insulation so not only does it heat your meal, it also keeps your meal warm the whole time you’re eating it — and longer if you’re still doing other camp chores. I would often start dinner and then set up my whole tent while my food soaked and I never worried about my meal being cold.
The dimensions are 5 x 5 x 2 inches, so it holds quart-size freezer bags perfectly. By transferring backpacking meals or other dehydrated food (like ramen, Knorr rice sides, and couscous) into freezer bags, you cut down on excess packaging weight and trash you have to pack out later on. Just pour boiling water right into the freezer bag and let your meal cook right in the REpack. This way of cooking also helps save fuel as the cooking is done in the pouch.
Check out our full review here.
Check Price at Hyperlite Mountain GearSea to Summit Alpha Light Long Spoon

If you follow the freezer bag method of cooking (explained above) on a long trail, then you’ll want a long spoon to reach the bottom of the bag more easily. This spoon ($8) is 8.5 inches long and only weighs 0.4 ounces, which is lighter than other spoons on the market.
Sea to Summit also makes a long spork and for the same price. Though, I prefer the Sea to Summit Alpha light long spoon to the spork because I’d typically add extra water to each meal for extra hydration.
Check Price at REICheck Price at Amazon
LifeStraw Peak Squeeze Water Filter System – 33.8 fl. oz.

There’s nothing better than drinking water right out of a flowing creek in the mountains. But you’ll still need a way to filter it before taking that first satisfying gulp. LifeStraw’s Peak Squeeze 3.9-ounce filter ($43) is incredibly efficient for fast filtration. And it has a 2,000L lifespan!
I also liked how compact it was; its dimensions are 9.48 x 4.8 x 2.67 inches. The filter bag wrapped around the filter comfortably, and it easily fit into the outside mesh pocket of my backpack for quick retrieval. I cleaned it out each time I was in town so it would keep flowing smoothly.
In general, though, the output is 101 fluid ounces per 60 seconds. Water filters are a vital piece of thru-hiking gear, and you can check out the roundup of the best backpacking water filters of 2023.
Check Price at REICheck Price at Amazon
Therm-a-Rest NeoAir Micro Pump
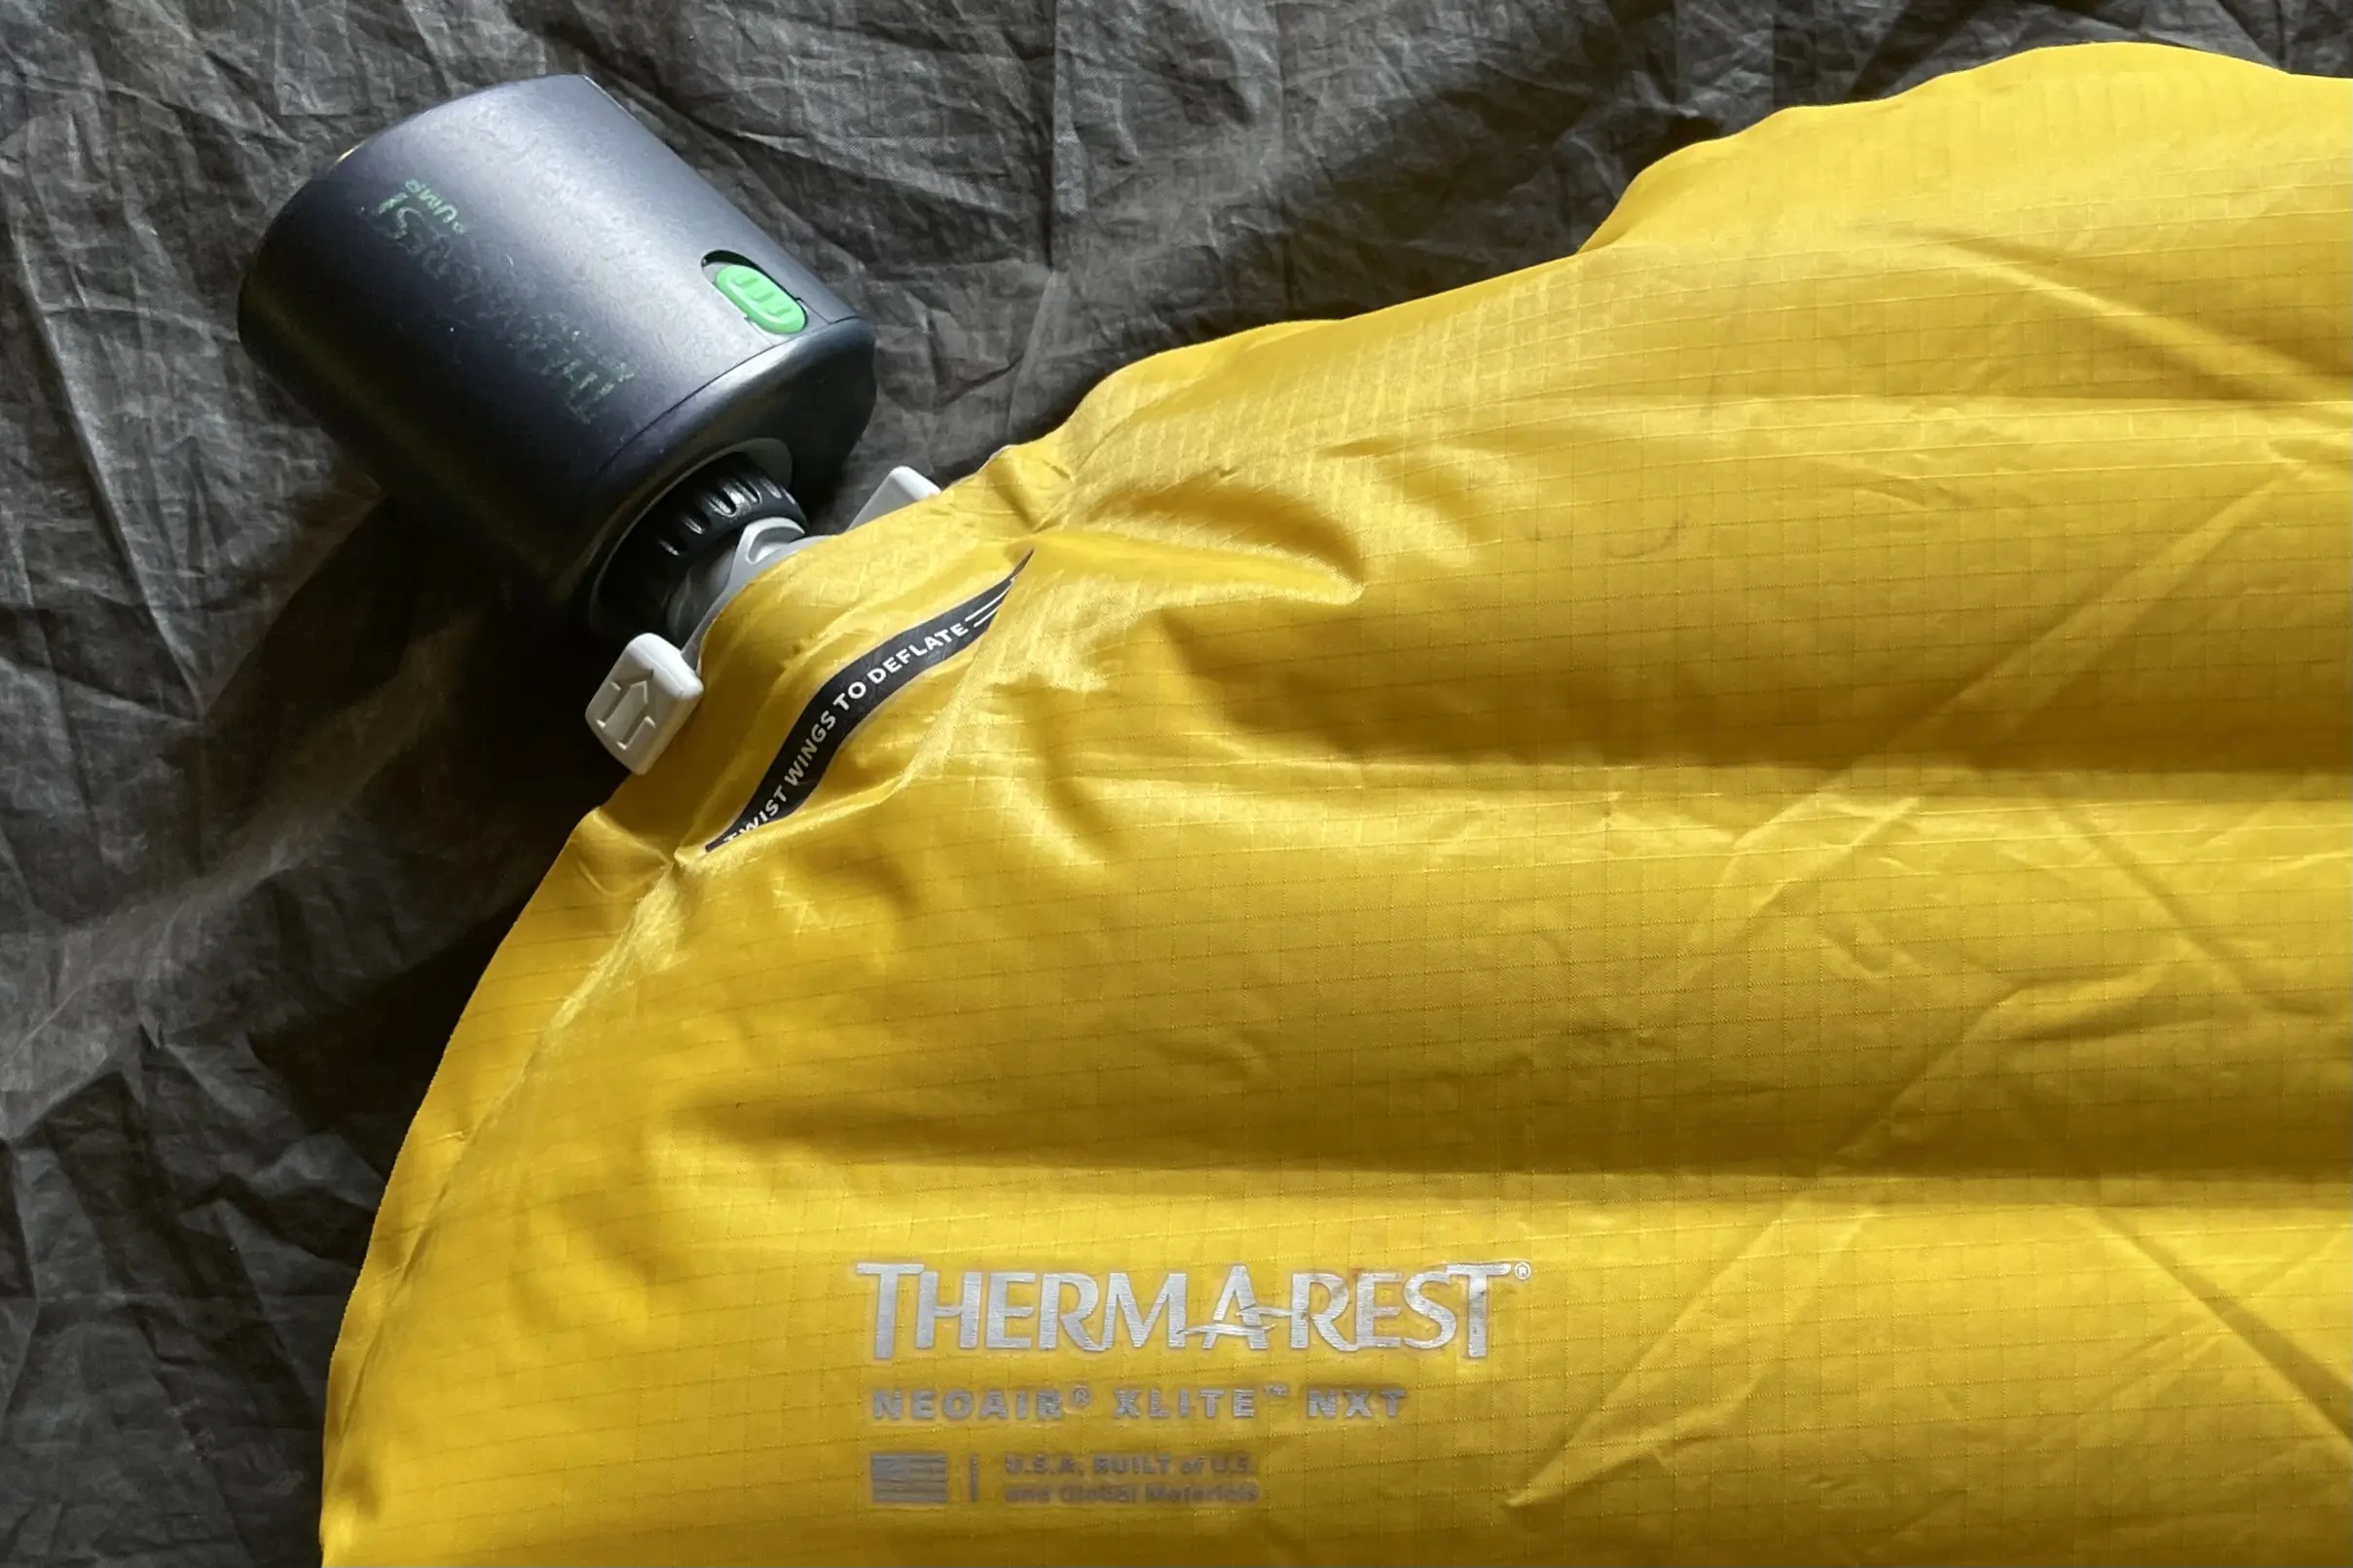
This pump ($42) is most certainly a luxury item but one that I was happy to carry, as I used it every night. It weighs 2.3 ounces, and it takes two AAA batteries. I used the lithium ones, so I only had to replace the batteries three times the whole time on the AT. The NeoAir Micro Pump’s dimensions are 2.7 x 2.5 x 1.75 inches, so it’s very compact. It easily attaches to the Therm-a-Rest sleeping pads with both WingLock or TwinLock valves, and then you slide the button to “on.”
At the end of a long day, the last thing I wanted to do was spend time and energy blowing up my sleeping pad. After setting up the frame of the tent, I’d throw my sleeping pad inside, turn the pump on, and finish putting on the rainfly on the tent and staking it out. It’s easy, efficient, and a major energy saver.
Check Price at REICheck Price at Amazon
Sea to Summit Aeros Ultralight Pillow


Bundling up your fleece may work for a few nights but for a long thru-hike, you’ll want a comfortable night’s sleep every night. Named “Best Inflatable Camping Pillow” in GearJunkie’s Best Camping Pillows of 2023, the Sea to Summit Aeros Ultralight Pillow ($45-65) provides a comfortable night’s sleep.
I used the regular size (14.2 x 10.2 x 4.7 inches), which is 2.1 ounces. My boyfriend used the large size (17.3 x 12.6 x 5.5 inches) at 2.5 ounces. The deluxe Aeros pillow (3.5 x 16 x 5.5 inches) weighs 4.6 ounces. The mini multi-function valve makes it very easy to inflate and deflate, as air only travels in or out in one direction.
Check Price at REICheck Price at Amazon
Hyperlite Mountain Gear Pods and Roll-Top Stuff Sacks


Small items can easily get lost or damaged on the trail and in your pack if you don’t organize them. These Hyperlite Mountain Gear’s Gear Pods ($59-69) kept everything together, and I could easily retrieve what I needed with the zipper open and close.
I took the “brain” off of my pack to lighten the overall load, and the small, 9L gear pod placed at the top of my pack for accessories and snacks was a great replacement. I also used the large 11L gear pod for my clothes. They come in 9L, 11L, 13L, and 16L versions, all made with DCF 11. They range from 1.2 to 1.4 ounces, respectively.
Check Pods Price at Hyperlite Mountain GearCheck Roll-Top Price at Hyperlite Mountain Gear
Side Entry Pods


These side entry pods ($59-69) roll down to compress and then buckle closed. So these are perfect for things like clothes, a rainfly, tent footprints, etc. These come in 8L, 10L, 12L, and 15L sizes and weigh between 1.4 ounces and 1.56 ounces, respectively. I used the 8L size for my cold weather thru-hiking gear and the 8L one for the tent rainfly and footprint.
Check Side Entry Pod Price at Hyperlite Mountain GearRoll-Top Stuff Sacks 3L – 25L


These stuff sacks ($49-59) have a wider opening than the side entry pods, so I used the 10L version ($59) for my sleeping bag. They also have a 43L size for $79.
I’ve been using a mix of these pods and stuff sacks for years with my Hyperlite pack and this year with my Osprey pack, and they’ve helped organize and carry my stuff in a much better way. They’re also all water resistant, which gives your thru-hiking gear an extra layer of protection from wet conditions. While we used the Hyperlite Mountain Gear roll-top stuff sacks, there are other options out there as well. Sea to Summit sells its own dry bags, which are very similar in design and price.
Check Sacks Price at Hyperlite Mountain GearTherm-a-Rest Z Seat Cushion Insulated Sitting Pad
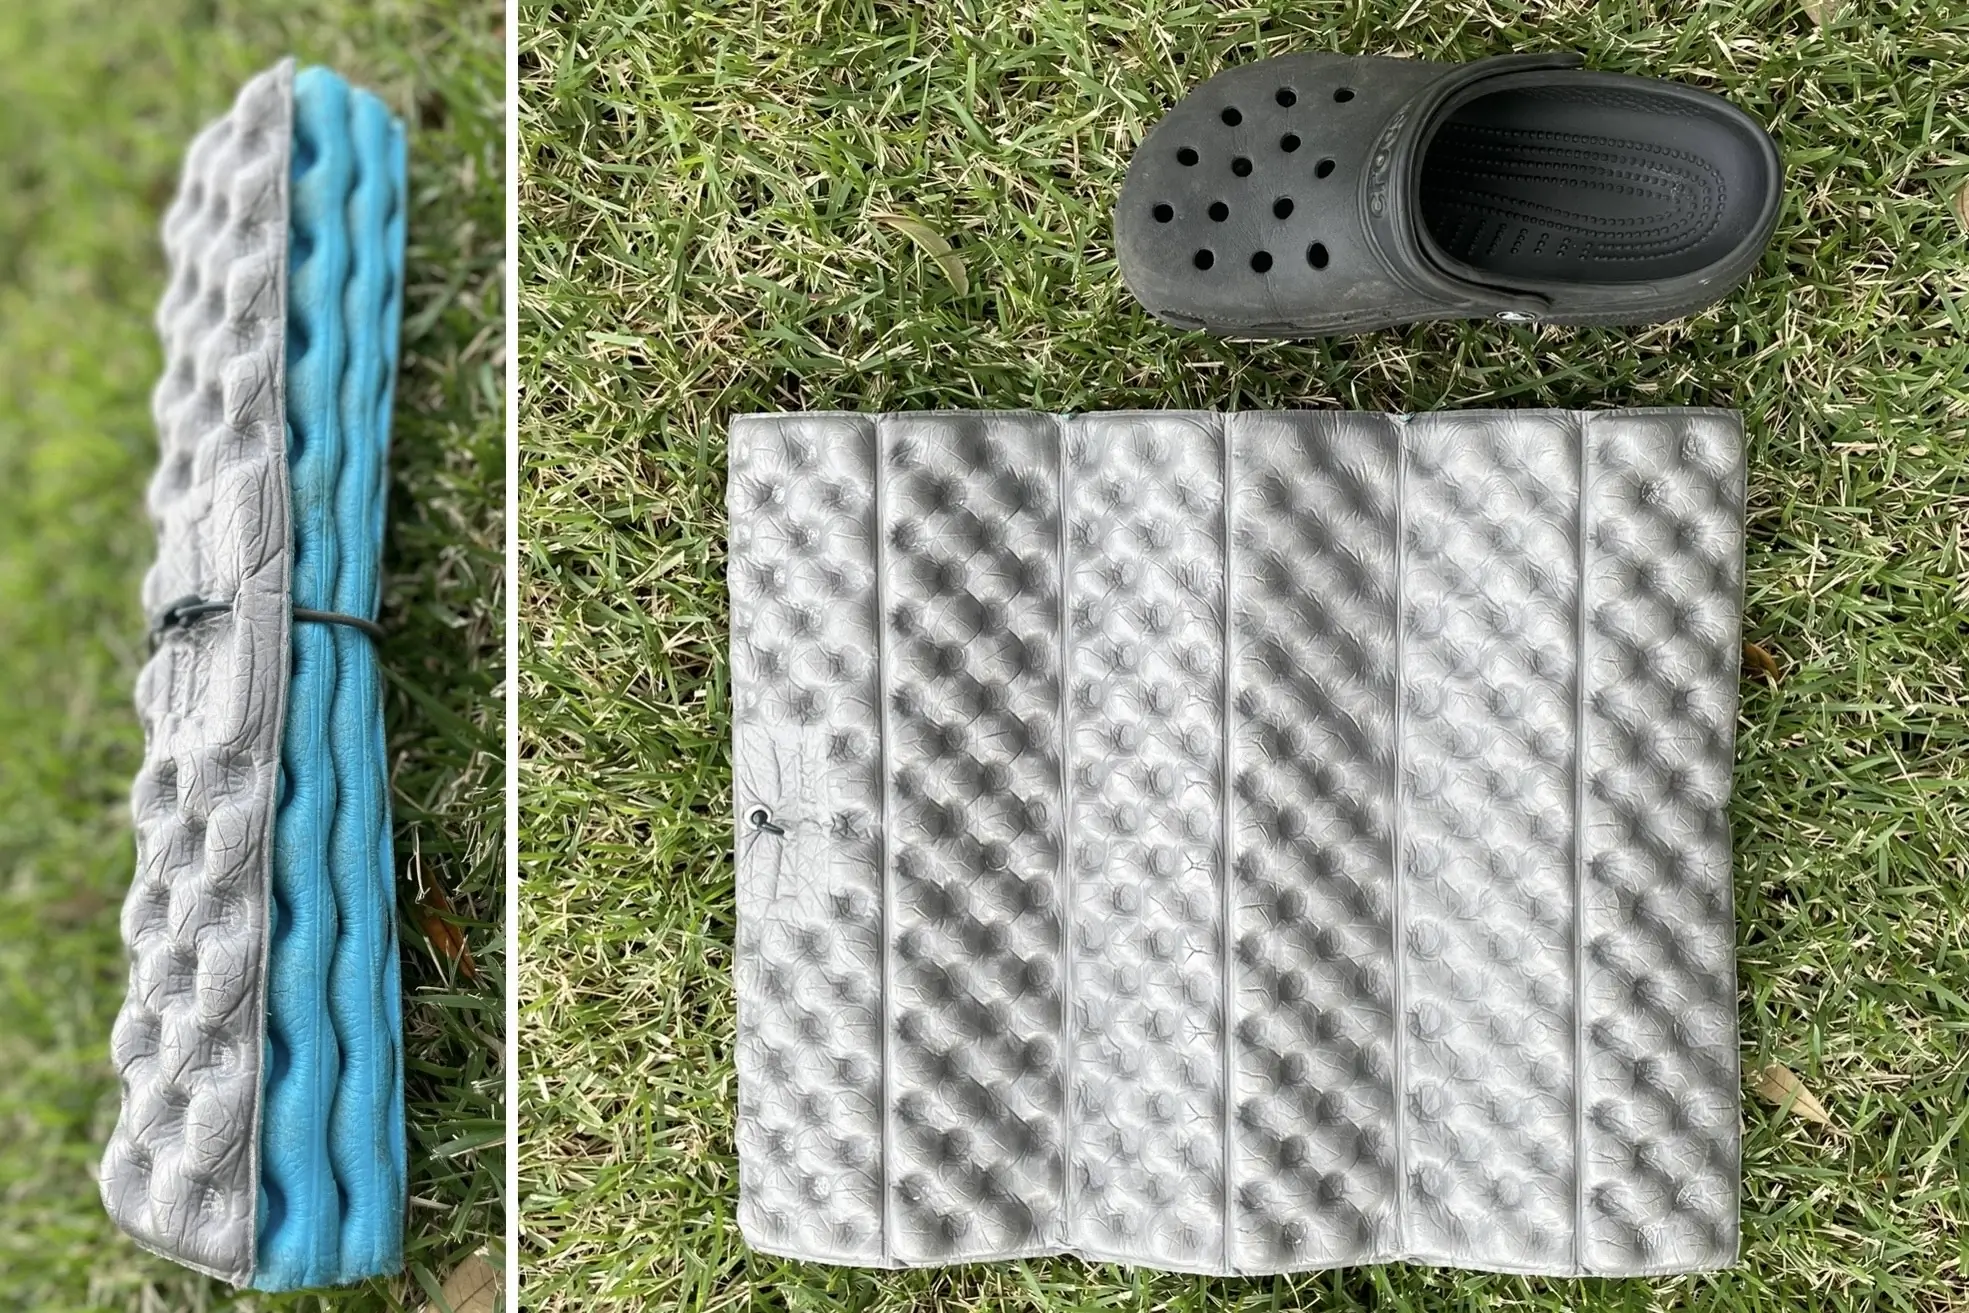


Originally, I protested the idea of getting this item ($32) because I thought it wouldn’t be necessary. But I was so happy to be so wrong. It only weighs 2 ounces, and I used it constantly. If the ground was wet and cold — which it often was — I had no worries about pulling this out of the top of my pack and sitting down for a comfortable, dry break.
The Therm-a-Capture technology reflects radiant heat, so it was extra helpful in the cooler months of my hike. When I was packing my things up, I’d kneel on this foam pad and give my knees some extra support, as they were already doing enough during the day. When the mosquitoes descended upon us in New Jersey, New York, and Connecticut, I waved this pad constantly to keep them away from my face and to keep cool. It felt like the perfect size, 16 x 13 x 0.75 inches, to wave around, sit on, and pack away.
Check Price at REICheck Price at Amazon
Anker USB-C Power Bank, PowerCore Essential 20000 PD


If you enjoy listening to music and podcasts, taking photos and/or videos, checking digital maps, watching downloaded videos at night, and generally using your phone often, I can guarantee your phone battery won’t last between town stops. You’ll need a portable charger.
The Anker USB-C Power Bank ($64) weighs 12.2 ounces and gives your phone an extra 92 hours of battery life (based on current smartphone batteries). It also recharges in 6.8 hours if you use their power delivery wall charger (not included). This was helpful for when I didn’t plan to stay in town, but I had access to an outlet for a few hours while doing laundry or eating.
It’s 6.2 x 2.9 x 0.8 inches so while I placed it in my gear pod during the day, my boyfriend placed it in his side mesh pocket for easier access. I may have been on low-battery mode the whole time. But I never fully ran out of battery while on the trail and that’s thanks to this power bank.
Check out the roundup list of Best Power Banks of 2023 for other options on the market.
Check Price at AmazonBlack Diamond Cosmo 350-R Headlamp


Being able to recharge the Black Diamond Cosmo 350-R Headlamp ($55) was super helpful on the trail. With my trusty powerbank, I never worried about my light losing juice, and it never did. It’s 350 lumens and the average run time is 5 hours on high, 10 hours on medium, and 225 hours on low.
There were plenty of times I would hike into the night and the medium light guided my every step safely. The red light was also perfect for shelter settings when I wanted to pack up early and other people were still sleeping. This red light feature is necessary for situations where you’re camping with other people you don’t want to disturb.
The BD Cosmo 350-R is a fairly standard size for a headlamp (5 x 4 x 2 inches) and weighs 2.65 ounces. I’ve used lighter headlamps before, but this one is my favorite choice because of the features.
Check out other options in the Best Headlamps of 2023 roundup.
Check Price at REICheck Price at Amazon
We get it — gear gets expensive quickly. As you prepare for your next thru-hike, knowing which gear is necessary helps balance the budget and your trail weight. These were my pack picks for under $75, and they served me constantly on the AT. Even if you use this guide as a jumping-off or starting point, hopefully, it helps you fill your pack with affordable and functional gear.


