Winter Photography: 10 Tips
By JAY KINGHORN
Winter is a fantastic time for photography. The crowds are thin, the air is clear and the sun is low in the sky, making the good light better for longer. Here are a few tips I’ve gathered from years of shooting in the wintery Rocky Mountains.
1. Keep Your Camera Cold
It may be tempting to warm the camera’s batteries by putting the entire camera inside your jacket. Don’t. The warmth of the jacket combined with the humidity inside will fog your lenses and viewfinder as soon as they are again exposed to the cold. The same holds true for entering a ski lodge, warm tent or toasty car. If you keep your camera cold, the lens will stay fog-free and ready to use.
2. Bring Extra Batteries
Nothing kills your ability to photograph a winter wonderland faster than a dead battery. Cold saps power from batteries much faster than warm weather. To ensure you can shoot uninterrupted, keep a second battery in a jacket pocket, close to your body. As the battery in your camera begins to wane, swap the cold battery with the warm one from your jacket. As the cold battery re-warms next to your body, the power will return allowing you to continue shooting.
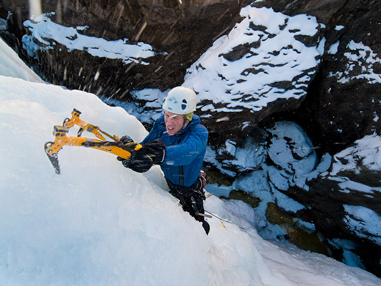
photo by Jay Kinghorn
3. Know Your Camera
Quick quiz. Without looking at your camera. What are the steps you need to take to change your camera’s ISO sensitivity? Spend extra time becoming familiar with all the controls on your camera at home, where it’s nice and warm, before venturing out into the cold. In extreme situations, when you’re using heavy gloves, it can be difficult to adjust your camera’s settings. Knowing where all your camera’s controls are located helps you work quickly should you need to take off your gloves to make an adjustment.
4. Check Your Histogram
A bright, sunny day on the slopes is among the most difficult scenarios for judging exposure. The glare reflected off the white snow and the deep shadows in the trees can easily fool the camera’s built in meter. Check your camera’s histogram to make sure you aren’t losing bright highlight or extreme shadow detail. A histogram is a simple graph showing the shadow areas on the left, the midtones in the middle and highlights on the right. What’s most important is to check to make sure there isn’t a cliff on either edge of the graph. A cliff indicates that detail in either the highlight (right side) or shadows (left site) have been lost. If you see a cliff on either end of the histogram, use your Exposure Compensation to correct your exposure and take another shot.
5. Photographing in Bad Weather
Photographing in inclement weather, or just as the weather changes adds ambiance, texture and intrigue to your photos. Often, photographing on the cusp of a storm, either just as it approaches, or as the storm is breaking yields interesting light perfect for dramatic photos.
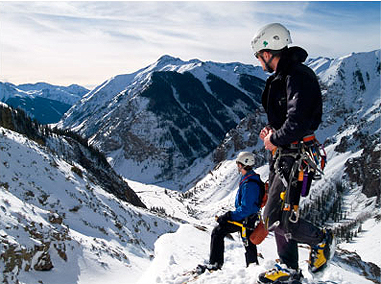
photo by Jay Kinghorn
6. Be Careful Where You Step
As you consider your composition, be aware of your footprints. You don’t want to trammel your pristine photo of a snow bank with a pair of boot prints. As you approach a landscape you find interesting, walk in a wide circle around the photo until you find the best angle, best light and ultimate composition. You may also wish to shoot a wide shot first then get increasingly closer to your subject as you’ll have undisturbed snow for each photo.
7. Boost ISO When Shooting Action
In the winter, the sun is lower in the sky and clouds often obscure direct sunlight. These factors limit the intensity of the light reaching your photo subjects. To stop action with winter sports, you’ll need to boost your ISO or use “fast” lenses with a maximum aperture of 2.8 or wider. My favorite lens for shooting in lower light is the Olympus 35-100mm f2 lens. For partly cloudy days, you can use ISO 200 for good results, for high overcast boost your ISO to 400 and when your photographing in the midst of the winter storm you’ll often need to boost your ISO to 800-1600.
8. Avoid the Sky
On high overcast days the sky is much brighter than the surrounding landscape. Even though your eye can see detail in the clouds, the camera will not be able to expose correctly for the foreground and the sky. Instead of interesting clouds, your sky will be a bright gray distracting attention from the foreground. Be careful to eliminate the sky from your compositions by selecting a high vantage or focusing on the details in the landscape. Save your expansive landscape compositions for another day with blue sky. Ideally when the storm breaks and clouds linger in the blue sky.
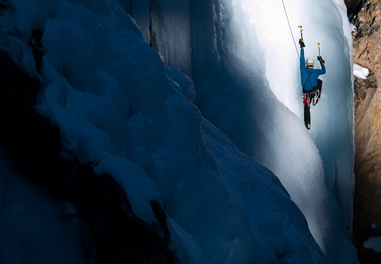
photo by Jay Kinghorn
9. Dress Appropriately For the Weather
At the risk of stating the obvious, it’s cold in the winter. If your fingers and toes are numb, teeth chattering and lips blue, you aren’t going to be able to concentrate on taking pictures. The most important consideration for shooting in any conditions is to be safe. Dress appropriately for the conditions. In the winter when I’m active, I bring an oversized jacket. It looks like a down jacket, but is made of synthetic material which doesn’t lose its insulating ability when wet. This allows me to dress lightly when I’m active, then put the coat on as soon as I stop moving. This keeps me warm in all types of conditions and allows me to concentrate on the task at hand, whether it is belaying my partner on an ice climb or photographing elk in the early morning light.
10. Invest In Good Gloves and Warm Boots
A corollary to the ninth tip is to invest in good gloves and boots. Your extremities are the most susceptible to frostbite in cold conditions. You want boots that fit well so your foot doesn’t move around excessively and cause blisters. You also need to avoid boots that are too tight as they prevent your body heat from circulating around your feet, keeping them warm. I like to bring at least three pairs of gloves whenever I venture out into the wilds. I usually have a thin pair for dexterity, a second for moderate warmth and a third pair of heavy-duty insulation for when it’s really cold. Keep the thin pair in a jacket pocket so they’re always pre-warmed when you need them.
Photography and text courtesy of Jay Kinghorn. All photos shot with Olympus E-System cameras and lenses. Article adapted from the article “Winter Shooting Tips”on www.olympusamerica.com.

