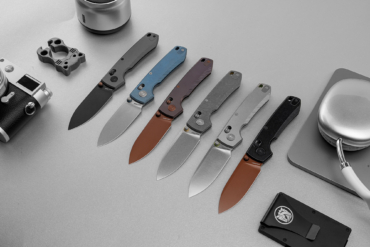
Anyone who owns a trusted blade should know how to sharpen it, and a whetstone is the classic method. Professional knife sharpener Peter Nowlan demonstrates three steps to the craft.
I say it all the time: There’s something deeply satisfying about drawing a blade over a whetstone. My own interest began 35 years ago watching my father sharpen a chisel.
Fast forward to today, and I’m a retired Navy officer running my own business in Halifax, Canada: New Edge Knife Sharpening. It’s a formality to make a little extra money pursuing a labor of love. As part of a partnership with Knife Planet’s free online knife sharpening classes, this article will help “whet” your whistle in crafting keener blades.
Below are three steps to learning the traditional Japanese practice of sharpening with a Japanese whetstone, also known as a water stone.
Whetstone Sharpening: What You Need
To get started, you will need the following:
- 1,000-grit whetstone—you can find these online for about $20
- Stone holder—anything to keep the whetstone steady as you sharpen
- Ample lighting and space
- Water and a clean cloth to wipe the blade
- Decent-quality knife
Step 1: Find the Angle

Lay the knife flat on the water stone and, holding the edge in place, raise the spine of the knife with your dominant hand to find the sharpening angle. The exact digit is not important; it’s maintaining the chosen angle throughout the process that matters.
This will be a challenge but gets easier with practice. A quick way to reach an angle is to lift the spine and place your non-dominant pinky between the spine and the stone. This will give you an angle of about 15–18 degrees depending on the thickness of your pinky.
You can also create a visual guide out of a roll of quarters or a piece of wine cork. Simply place the roll or cork on its side at the end of the stone and rest the spine on top to see the angle you need.
Step 2: Raise the Burr
Burr formation is critical to sharpening success. What’s the burr? It is a very thin strip of metal, a deformation that forms at the  apex of the blade after you grind material away from one side. You can feel it, though it may be tricky at first. And it will always form on the opposite side of the one you are sharpening.
Drawing the blade over the stone pushes metal up and over the edge of the apex of the knife, where it builds on the opposite side. Basically, you are peeling away fatigued metal and exposing fresh, new steel when sharpening a dull knife.
The goal is to form the smallest burr possible by regulating sharpening pressure from the tip of the knife to the heel, and to make it as uniform in size as you can.
Forming the burr signals the switch from sharpening one side to the other. It also tells us we are reaching the very edge the knife.

How to raise the burr
Start sharpening the right side of the blade. With the tip of the knife at the bottom of the whetstone, push the knife to the top away from you. While doing so, apply pressure with two fingers on the blade. Those two fingers should be placed as close to the edge of the knife as possible without touching the stone.
You need to adjust your fingers as you move the knife back and forth. Because sharpening takes place under your fingers, start with them at the tip and, as you pull the knife back toward you, release pressure completely and pause. Then, shift your fingers just a little down the blade toward the heel. This finger dance is critical and takes time getting used to.

The motion of applying pressure this way is called Trailing Strokes. As you push the knife away from you, you apply burr-forming pressure until you reach the top of the stone. Then, as you pull it towards you, you release the pressure. You apply pressure in only one direction.
How to check the burr
Use common sense and know that moderate pressure is necessary to form the burr. I move from tip to heel, then heel to tip a few times, and then check for a burr.

Be careful: Don’t move your fingers laterally along the edge, you’ll cut yourself. Feel for a rough area running from tip to heel. Again, it takes time to know what to expect because the best burr will be subtle. Just know that the bigger the burr, the more metal you are removing—more than necessary. Don’t worry, you won’t ruin the knife doing this. You’re learning here, and mistakes are part of the sharpening journey. Learn from them.
Switch sides
As soon as you feel the burr, it’s time to sharpen the opposite side. The idea is to remove material, thus creating a burr on both sides of the blade.
The final goal: Form a burr, consistent in size and length (heel to tip), on both sides of the knife. Then, we go to the final step.
Step 3: Remove the Burr

Removal of the burr is just as essential as forming it. Your goal is to finish the sharpening process with as clean an edge as possible.
We do this by following the same pattern, same angle, and same motions but with reduced pressure. Whatever level of pressure was necessary to form the burr, reduce it by approximately 50 percent.
Simply by reducing the pressure, you will start to shave any remaining burr off of the apex of the blade. You’re now cleaning the edge.
Beginning on the right side of the knife, move from tip to heel and heel to tip, then flip the knife and repeat. For the left side, it’s opposite—start at the top of the stone to reach the heel area completely. So, you will move from heel to tip and then tip to heel. Remember to apply and release pressure as you did earlier, exactly the same as in Step 2, but with light, refining pressure.
Finish by further reducing pressure as you repeat the process above. Visualize the goal: cleaning the old edge and forming a new, sharp edge.
Keep doing this, and test your knife for sharpness by cutting a piece of paper or a tomato. If you’re satisfied, you’re done. You now have a sharp knife. You did it!


