Sea to Summit enters the bikepacking tent scene with shorter tent poles and two dry bags for packing.
More brands are jumping on the bikepacking tent game, and Sea to Summit launched their version of a bikepacking tent this past summer. We tested the Telos Bikepacking TR2 on multiple weekend bikepacking trips in Minnesota and also used it for backpacking for this review.
In short: The Sea to Summit Telos Bikepacking TR2 is not one of the cost-friendly bikepacking tents, but for cyclists with a small framed bike, or anyone looking to maximize their available space, it might be worth it. Although sheltered bike storage would have been a welcomed addition to this tent, it made up for it with its easy-to-use design and comfort.

Do You Need a Bikepacking-Specific Tent?
Maybe not. But there are notable differences between bikepacking and backpacking tents. Both aim to be as lightweight as possible, but the most significant difference is the tent pole segment length.
Bikepacking-specific tent poles can be placed on the handlebars, within the frame, or on a fork leg, as examples of potential storage locations that aren’t possible with standard-length poles.
Another notable difference is how they are packaged. Bikepacking tents typically come in a stronger, more durable, and water-resistant bag, given that it will be exposed to the elements while strapped to a bike rather than inside your backpack.
So while I’ve tried both, I highly recommend using a tent like the Sea to Summit Telos Bikepacking TR2 when adventuring by bicycle.

Telos Bikepacking TR2 Setup
I will never understand why a footprint isn’t included in a $600 tent (sigh). I ordered the Telos Bigfoot footprint to accompany the tent. It is wider than its Telos Lightfoot version; I prefer to have additional space to set gear and shoes.
The pole system is color coded with the tent body, which made it easy to figure out which way the poles went. The rainfly clips to the poles differently than on most tents, and I didn’t know I was doing it wrong until the third use. This different method allows setting up the rainfly first, ensuring that your tent stays dry during the pitching process.
The setup took more time than usual on the first couple of trips, but by the third time, I could quickly put it up myself. This tent sets up in six different ways outside of “classic mode.”
It can turn into a covered shelter to sit under with “fly only mode,” and from there, it converts to a more open “hangout mode” to be used at a park or beach, maybe with camp chairs underneath.
There’s “inner only mode,” familiar to most tent owners, omitting the fly when Mother Nature isn’t a worry. And if used, the rainfly also folds up in a couple of different ways, providing you with “partial fly mode” and “two doors mode.”

The Sea to Summit Telos 2 Bikepacking in the Field
We pulled into our tent space (an open field in Wisconsin) just as the rain started to come down. We’d managed to make it 46 miles with only a light mist, but now we weren’t so lucky.
I unstrapped the tent from my handlebars in a rush to get my gear inside before it really let loose. All tent components were completely dry inside their storage sacks. We thanked Sea to Summit for its color-coded poles and loops as we pitched the tent with our tired minds.

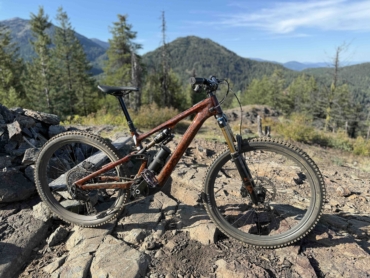
Previously, we used a lightweight backpacking tent for bikepacking, but having the Telos TR2 was crucial for my XS Cosmic Stallion. I could attach the tent to my handlebars using its Hook-Release Straps. It would have also worked great on forks, given proper mounting hardware.
If you’re like me and worry about having enough sleeping space in a small tent, you’ll appreciate this tent as much as I did. I don’t particularly enjoy having things around my face while I sleep, but I felt comfortable and free to breathe.
The Bikepacking Telos TR2 is wider at the head and smaller at the bottom near the feet. My 5’7″ partner and I could sit up comfortably to play cribbage inside the tent while hiding from the mosquitos on one of the nights. I even felt like there was enough space to store some of my belongings by my head and in the side pockets.
More Interior Storage
One of the most exciting parts of this tent was the Gear Loft (purchased separately). If you ask my partner to describe the gear loft, he’d tell you, “It’s bitchin’.” To maximize storage in the small space, Sea to Summit made a gear loft that hangs from little hooks in the top corner of the tent by the feet.
It’s perfect for extra layers, socks, headlamps, or whatever you want to have easily accessible in your tent. I loved it — 10/10 recommend purchasing it if you like to keep your stuff inside your tent with you in an organized fashion.

This tent also had excellent ventilation, something I wasn’t expecting to experience or notice. It was a bit chilly for almost all the nights we tested this, dropping down into the low 40s overnight. We stayed warm without the steamy condensation that can collect when your body is warmer than outside.
We also attached this tent to our packs during a weekend backpacking trip in northern Minnesota (also a misty weekend). Overall, this tent held up in the woods, on the grass, over gravel and dirt, and through rain and sun. While it doesn’t have bike parking (a huge bummer), it has everything else and kept us well-sheltered on our adventures.
Packing functionality was the most significant benefit of this tent. If you bikepack or are looking to do so, this tent is excellent, especially if your bike is on the smaller side.
The waterproof storage bags allow you to strap it on the outside of your bike, and the tent will remain protected in any weather. It even comes with straps, so you don’t have to buy anything separately.
The Glitch
The Sea to Summit Telos 2 Bikepacking was incredibly difficult to get back into its bags. Stuffing, folding, and rolling — nothing relieved the frustration of repacking this tent.
Because it was so hard to put into the storage sacks, I think the bags could benefit from a compression system or valve to suck out all the air. I don’t think I’ll ever be able to get it back to the original size.
Specifications
Specs
- Best use: Bikepacking
- Seasons: Three
- Sleeping capacity: Two
- Fly + footprint pitch weight: 2 lbs., 10.3 oz.
- Minimum trail weight: 3 lbs., 5.2 oz.
- Packed weight: 4 lbs., 3.5 oz.
- Floor dimensions: 84.5 x 53 x 43 in.
- Floor area: 28 sq. ft.
- Vestibule area: 19.5 sq. ft
- Peak height: 43.5 in.
- Number of doors: Two
- Number of poles: One
- Pole material: DAC Featherlite NSL 8.5 mm and NSL 9.0 mm
- Pole diameter: 8.5 mm and 9 mm
- Canopy fabric: 15-denier coated polyester mesh
- Floor fabric: 20-denier ripstop nylon
- Rainfly fabric: 15-denier ripstop nylon
- Footprint included: No
- Design type: Freestanding
- Price: $649

Conclusions
This tent is admittedly pricey, but it worked great. For small people with small bikes like me, where space storage is limited, a bikepacking-specific tent like this is crucial. The space inside is well-designed and versatile, and the multiple setup options are novel. You can find it on Sea to Summit’s website; it’s already sold out at REI.
Check Price at Sea to Summit


