Anyone can film a hunt. Here’s a view beneath the surface on how to get started documenting your adventures.
If there is one trend that seems to be growing like a weed in the hunting world, it’s filming hunts. Folks increasingly are wanting to document their hunting adventures — and not only that, but also share them with the world. However, wanting and doing are two totally different things.
While many people fantasize about showcasing their hunts via film, there is no doubt that it’s a bit daunting. This is especially true if you’re not familiar with how to work a camera. The truth is: anyone can film a hunt.
So, in order to shorten the learning curve, I’m going to break it down for you here, from camera gear and being in the field to storytelling and the importance of staying committed. I’ll even touch on what to do after the hunt.
Filming a Hunt 101: Gear You’ll Need
Camera Gear

Everybody loves gear, so let’s start there. Right from the get-go, let me say this. You do not have to break the bank to film a hunt.
When I first started, we literally filmed our hunts with an iPhone. That’s it. No fancy lenses, mics, or anything. Just a desire to capture our adventures. And that’s the main “piece of gear” you need.
Aside from that, it just comes down to how much image quality you’re looking to get for your filming. Just know that with better image quality comes a higher price tag.
Camera Options

There are three main options when it comes to cameras past the point of a smartphone and digiscoping: point-and-shoot, Handycam (like a GoPro), and DSLR/mirrorless.
Each has its own strengths and weaknesses, but all of them are capable of capturing your hunt. Which one you go with is going to be a reflection of how deep in the weeds you really want to get.
The more simplistic approach would be to go with either a point-and-shoot or Handycam. Both of these are a “turn it on and hit record” type of camera. They’re fantastic options, especially for beginner filmmakers.
If you want to kick things up to the next level, you’ll land on DSLR and mirrorless cameras. These are going to offer the best image quality for that more cinematic feel.
They’re also going to take a bit longer to learn how to use. It’s a more complex system with settings out the wazoo, detachable lenses, and more features than one can shake a stick at. The end results, though, are breathtaking.
For cameras with detachable lenses, I’m a big fan of telephoto lenses (variable zoom) over prime lenses (no zoom) for filming hunts. They are more versatile and allow me to carry fewer lenses. A 24-70mm f2.8 is my personal go-to for most situations.
With any of these options, make sure you’ve got some sort of way to protect it from the weather. This can be as simple as a ziplock bag or as fancy as a custom rain shield.
Audio

With your camera, you’re also going to want a decent microphone. To put things in perspective, I’d rather have subpar footage and great audio than great footage and subpar audio. Bad audio is just a killer.
Shotgun mics are going to be the most practical option. They simply attach to the top of your camera. With that being said, they might suffer a little in the wind, even with using a dead cat (that fuzzy thing you see on mics, also known as a windshield).
Lav mics will offer the best quality but are more of a pain to have in the field. These are the small mics you see attached to a shirt.
Power Supply and Storage

For battery life, it’s smart to both carry extra sets of batteries as well as some sort of charging station. There are multiple charging options out there. Some are even solar.
And along with power, make sure you’ve got enough storage for your video. I carry multiple 128GB SD cards with me. Video footage takes up a good amount of space, especially if you’re filming in 4K.
Bottom line, running out of power or storage can cause you to miss those ever-essential pieces of the story you’re trying to tell. Like moments of genuine emotion, unexpected animal encounters, or missing “the shot.” Stay ahead of the game.
Key Camera Gear Items
- Camera
- Tripod/monopod (will help mitigate shaky footage)
- Mic
- Weather protection
- Extra batteries
- Camera
- Mic
- Weather protection
- Extra SD cards
Easy Access

With all of that in mind, make sure you have easy access to this camera of yours. Too many times I’ve seen, and fell victim to myself, a camera being in a backpack not being utilized. You can’t film your hunt with the camera put away.
There are several capture-type clips on the market that will attach to your pack. Doing so will allow you to have access to your camera at all times. I use a Peak Designs capture clip.
Story Is Everything
One of the goals of filming a hunt is telling a story. And a good story will honestly outweigh good camera work. It’s what hooks people and leaves them wanting more. These can be as complex or as simple as you want, but there is always a story there.

For that reason, I like to always ask myself, “What story am I trying to tell?” I’ll do this both before I leave for a hunt and then again after.
Before, it allows me to have some sort of direction for what to film once I arrive in the field. And when I leave, the events that unfolded during the hunt just add more layers to that story.
Another thing I’ll do before I leave to film a hunt is come up with a loose storyboard or shot list. A group of key shots that will help tell the overall story and showcase the experience (see example list below).
Be sure to get a variety of shots, not just people talking to the camera. Things like camp life, local flora/fauna, and landscapes. Try to make viewers feel like they are there with you. Always film adversity, too, whether it’s a flat tire or the reaction of a missed shot. These types of shots can take your project from just a video to a film.
A basic shot list might look something like this:
- Establishing shot of area (your setting)
- Getting ready at the vehicle
- Hiking
- Landscapes
- Animal sign and wildlife (both flora and fauna)
- Glassing
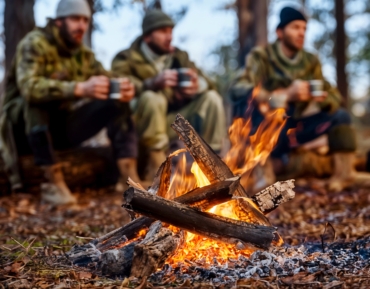
- Camp life (cooking, campfire, getting ready for bed, etc.)
- Inclement weather
- Admiration of a harvest (closeups of antlers, claws, and hide)
- Putting meat in the cooler
Image Composition
To really kick up the overall quality of your filming, image composition is something that you’ll want to learn and pay attention to. While filming is just as easy as turning on a camera and hitting the record button, it’s also so much more. And that so much more makes the end product that much better.

First, I’d highly suggest that you learn how to operate your camera in Manual mode. Yes, there is a learning curve here, but I promise you it’s worth it. By knowing how to use a camera in Manual, you’ll have so much more control over how an image looks. Learn about the exposure triangle and how to manipulate it (ISO, shutter speed, and aperture).
Another thing to learn about is the rule of thirds. This is a fairly easy guideline to use when composing an image. Basically, it breaks up an image into thirds both vertically and horizontally.
Most cameras actually have a grid setting where you can see this while shooting. By placing your subject on either the left or right side of an image using these lines, you’ll get a much more eye-catching and natural look. It gives an image flow, in my opinion. You don’t always have to use this, but it’s a great starting point.
Lastly, please pay attention to natural light. The sun can either be your best friend or your worst enemy. Learn to use it to your advantage, and your footage will be much better.
A few quick tips are to try to shoot with a backlit subject, keep even lighting on them and avoid harsh shadows, and take full advantage of “golden hour” (the first hour and last hour of light) to capture those cinematic shots. Cloudy days are also excellent for filming, as they cast an even light on everything.
Stay Committed
Filming can be quite arduous. It’s a ton of work and anyone that tells you otherwise hasn’t done it much. As a hunt goes on, and especially a tough hunt, it can get harder and harder to pick up the camera.
You lose inspiration. I’ve been there. That’s the stuff, though. Those are those real moments that need to be shared!

When you keep on blowing stalks on deer and are ready to pull your hair out, the camera needs to be recording. If the weather is bad and you’re held up in the tent for a few days, the camera needs to be recording.
Again, film adversity and capture that unfiltered raw emotion no matter how much you or your friend don’t want a camera in your face. Stay committed to the process. You’ll be glad you did.
After the Hunt
After the hunt is over, now comes the fun part. Take all of the footage you’ve captured and render it down into a much more digestible form. This is where you really have the creative liberty to make this film how you want it.
You could use some sort of free video editing software, or you could buy something like Adobe Premiere Pro or Final Cut Pro for a much more in-depth edit.
You can take this as far as you want it. Splice something together sequentially in a fairly basic format or add layers upon layers of art.
For instance, you can add captivating music, and saucy motion graphics to help the story along are great. Getting creative with your transitions and even adding in voiceovers are other options. You’re in the driver’s seat here.
It’s Worth It, I Promise

While the process of filming a hunt can be quite daunting, I promise you it’s worth it in the end. And that’s not just to have the ability to share your adventure with the masses either. Once it’s all said and done, you’ve got this piece of time logged and forever there to look back on.
Tell your stories to give your kids a glimpse into the wild life of Mom or Dad. And for their kids to see how cool Grandma or Grandpa used to be before they were old and gray. Lastly, tell your story to inspire others.
Hopefully, the films that we create today will inspire the hunters of tomorrow to do the same — and all because you decided to hit record on your camera.


