Washed-out photos with too much snow and sun are common photo faux pas on high peaks. Instead, capture the alpine light (and the climbing action) just right with these tips.

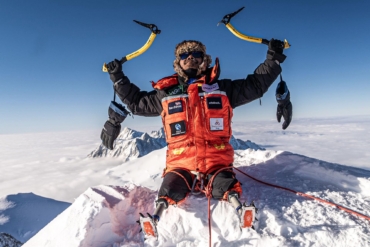
Last summer, a team from JanSport climbed Washington’s 14,411-foot Mount Rainier for the 45th year in a row. I joined the group to document the effort and kick steps toward the top.
Spoiler: Weather killed our summit bid. But on Rainier, I had a chance to dial my system for the cold, sunny, windy, exposed situation every mountain shooter knows – and too often fears. Learn from my experience (and past mistakes) with these tips below.
Tips For High Mountain Photography
1) A Battery a Day
On Rainier, I shot with a Sony a7R II and brought four charged batteries. We were on the mountain for three days, and I went through three whole batteries. As a rough estimate, I often bring one battery per day when going light and shooting outdoors.

2) Batteries Close to Body
Cold can suck the life from batteries. To mitigate this, I keep batteries as warm as I can by stowing them next to my body inside pockets. And at night, I sleep with my batteries in my sleeping bag.

3) Quick Optics Switch
Don’t change your lens in the blowing snow. This might seem like a basic tip, but you can really damage the sensor if anything gets inside the camera. You also run a risk of fumbling the lens with cold fingers and dropping it down the mountain. If you do need to change a lens, turn your back to the wind, open your jacket, and create a mini safe zone. I like to do this sitting down so if I accidentally drop something it falls in my lap. Just make the change quick!
4) Socks for Lenses
I rarely bring a dedicated padded camera bag or cases on climbing trips. They take up too much space. Instead, I pack my camera and lenses in thick hiking socks. They have just enough padding to help keep gear safe.
5) Watertight Bag
Even if it’s cold and dry, bring a waterproof bag. If you get caught in a rainstorm, you’ll be very happy you have one. Plastic garbage bags also work fine in an emergency.

6) Temp Variances
Abrupt temp changes can fog up your camera and lens. That’s bad on a cold mountain because bringing it back into the chilly elements will freeze that fog. So don’t put the camera inside your jacket while hiking, or bring it inside a warm group tent. Batteries should be kept warm, but the camera should remain around a stable temp.
7) Rear Display Off
In some cameras, including my Sony, you can review photos in your viewfinder, not on the rear display. To find out if yours is one of them, check menu settings about reviewing images through the electronic viewfinder. Number one, this saves battery. Also, it’s easier to view the image in the alpine sun, where the rear display can be washed out and hard to see.

8) Stable Trick Shot
Use your body to stabilize shots. In low light, shutter speeds need to slow down to properly illuminate a subject. While using a tripod or stable object to hold the camera in low light, this trick will help capture images when you don’t have time to set up.
First, I switch my camera to a higher frame rate to increase my odds of a sharp frame. Then, with the strap around my neck (and attached to the camera), I extend the strap fully and position it against my body to act as an anchor. The tension on the camera strap against my body helps steady the camera.
9) Filter for Snow Glare
Use a polarizer to knock down glare. Polarizers work and are a great asset in snow. They help saturate your colors and reduce glare from snow and ice.
10) Trust Your Histogram

In the bright sunlight, I never trust my screen to tell me if my exposure is correct. The histogram is a horizontal chart with vertical values of blacks and whites. Blacks are on the left, and whites on the right. Good exposure typically has a bell curve in the middle of the chart.
–Paul Vincent is a Minneapolis-based photographer, videographer, and contributing writer with GearJunkie.


