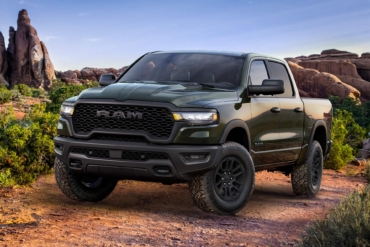
When Cascadia 4×4 offered us a chance to try out its hood-mounted vehicle-specific solar (VSS) system, I jumped at the opportunity. Why? Because I’m a geek who loves solar things — I was even on the Solar Car Team for the University of Michigan. Plus, I’ve always been a fan of the hood blackout aesthetic.
Why would you want to slap photovoltaics to your hood? It’s all about real estate. If you cruise around in an Earthroamer, you probably don’t need this, as you have tons of surface area on top of your rig. For those of us with SUVs and station wagons, space is at a premium. I keep my roof reserved for toys like surfboards, mountain bikes, and most recently an iKamper RTT.
In short: The Cascadia 4×4 VSS System is an impressive product for SUV and truck owners who need some extra power when the vehicle isn’t moving. This is especially true for outdoor adventurers who use their roofs for hauling big pieces of gear, an area that could otherwise be utilized for solar panels.
- Power: 65W to 135W
- Kits include: Solar panel, MPPT controller, vinyl hood mount, squeegee, zip ties
- Fits: 29+ popular AWD/4WD vehicles
Pros
- Efficient solar panel
- Great use of space
- Ease of use
- Durable
- Custom fitment for a wide range of vehicles
- 2-year warranty
Cons
- Not inexpensive
- Not easily movable to optimize solar capture
- Not transferable between vehicles
Cascadia 4×4 VSS System Review
Cascadia 4×4 offers solar solutions fit specifically for 29 popular off-road and overland vehicles with more in the pipeline. They can deliver 65W-135W of rated power, depending on how much hood you have. Our Land Rover LR3 test vehicle has a generous flat hood to work with and easily fits a 100W panel.

In addition to a solar panel, you will need a place to put that energy. Fortunately, I already have a secondary battery installed — a small lithium pack to power my refrigerator, laptop, and lights. It generally lasts 24 hours doing those tasks, but only charges when the car is running.
Hood-mounted solar allows me to charge while stationary, without removing gear from my roof or setting up external panels at camp. Solar allows me to stay parked at camp and keep everything powered for days — if there’s sunshine, that is.
Cascadia 4×4 VSS Install
Cascadia 4×4 gets my vote for “instruction booklet of the year.” Great photos, hints, tips, and some humor thrown in. This is very welcome because while the install isn’t hard, there are many ways to screw it up if you’re not careful.
Another great resource is Atlantic British‘s excellent install video:
Be prepared to take your time, be methodical, and have a second pair of hands. Save that adult beverage for the finale!
Hood Solar Install Stage 1: Panel Install
As always, start with a clean rig!
The first step is installing a vinyl surface protector. That second pair of hands will make this much easier — I managed to pull it off solo but wouldn’t recommend it.
It’s always good to test-fit parts before you install — and boy, was I glad I did. The vinyl in my kit wasn’t cut properly — a big bummer, as I was tight on timing for a weekend trip, but Cascadia 4×4 was quick on the support and offered to send a replacement the next day.
Armed with the correct vinyl, you’ll need your hood to be spotless and cleaned with isopropyl alcohol.

Next, grab some soapy water spray and go crazy — you want to float your vinyl protector into the proper position before squeegeeing it in place. If it’s not perfect, you really don’t need to worry, as no one will ever see the vinyl once the solar panel is mounted.
The next sticky part is installing the solar panel itself with 3M VHB tape. I highly recommend test-fitting both the panel and wiring before sticking it down — you only get one shot at this. VHB stands for “Very High Bond,” and it lives up to its name. There is zero chance the solar panel will come off without some serious prying.
As with any adhesive, start with a very clean surface and use the provided prep materials. After a few nervous minutes of peeling off the backing and applying pressure, I was ready for a victory beverage — but first, wiring!
Hood Solar Install Stage 2: Wiring

The installation kit Cascadia 4×4 sent was very comprehensive and had more zip-ties and zip-tie mounts than I needed. The solar panel has just two wires, positive and ground. You’ll want to run a solar charge controller MPPT device between the panel and your house battery.

Cascadia 4×4 offers these as an option, but our LR3 has already been upgraded with a RedArc BCDC125 DC-DC converter which is prewired for solar. This made the wiring trivially easy — the positive wire input was a simple splice into the Redarc, and the ground wire is tied to the chassis ground. Within minutes, I had the green light for solar charging my Dakota Lithium house battery.

Cascadia 4×4 Solar Performance
The Cascadia 4×4 VSS 100W panel on my LR3 had no trouble powering a weekend trip. I was able to run my LR3’s center console refrigerated cooler all night, keep the chill out of the rooftop tent with a 12V heated blanket, and recharge the laptop used to write this. By the time I was back from a morning of mountain biking and a luxurious stop at the White Salmon Baking Company, my battery was back to 90%.

Being the electrical geek I am, I wanted to see exactly how much energy was coming in, so I pulled out a voltmeter. I was pleased to find that a sunny April day in Oregon was good enough for about 40W.
Why am I happy with 40% of my rated output, you ask? Solar panels are rated for the power they can produce in watts in “ideal” conditions. The world is far from ideal, so It’s vanishingly rare to see a full 100W.
On a drizzly February afternoon, I measured 14W, which is respectable for an overcast winter day. I wouldn’t be surprised to see 75W from this panel on a sunny day in Oregon, but probably not any more than that. The same panel in the Arizona sun in July might get you close to 100W, though — geography makes a difference.

The power output of the panel also varies with the sun angle, MPPT effectiveness, state of battery charge, shading, and how clean your solar panels are. Many panels can struggle with partial-shade or low-angle lighting, but the VSS didn’t seem to suffer. I did not rigorously test this, but it would be sensible for Cascadia to pick solar cells appropriate for all the various conditions that your hood will be parked in.
Pricing & Availability
The Cascadia 4×4 VSS System is available now through Atlantic British for a wide range of Land Rovers, and through Cascadia 4×4 directly for over 29 different AWD/4×4 vehicles.
Ordering just the solar panel starts at $439 for smaller 65W installs, with the largest triple-panel 135W for a Dodge Ram being $839. You’ll almost certainly want to budget about $60 for vinyl hood protectors, and many will also need the MPPT charge controller, which tacks on an additional $104. The full kit for an LR3 comes in at $622.
Compared to other overland-ready solar solutions, the Cascadia 4×4 VSS seems like a fair deal. There are decent 100W rigid panels on the market for half the price — but then you’re back to roof mounting.
Another more versatile option is a portable foldout array. Overland-ready portable 100W systems can be had for around $500. This brings up one disadvantage of vehicle-mounted solar — you can’t move your array to track the sun. Portable solar panels can be repositioned for more solar gain.
Cascadia 4×4 VSS System: Summary

The geek-cool factor of solar on my hood is almost worth the price of admission on this kit, and it looks good to boot. I really appreciate that there’s no glare whatsoever — it does the job of hood blackout. It’s also very aerodynamic when compared to rigid aluminum-frame panels, so it may save you on gas.
A portable solar array is a nice alternative that can be repositioned, but it requires additional setup at camp — the VSS works any time there’s sun. A portable array is also a better choice if you often swap vehicles — the VSS is very securely mounted and would not be trivial to remove.
For those who need a full-time solar solution on an overland vehicle, the VSS might be your best bet. It’s lightweight, low-profile, and makes the most out of limited real estate. The kit seems well-made — and very well-documented and supported.
There’s an undeniable hood-bling factor to the VSS, but what you’re really buying is autonomy. The VSS offers you more time in the backcountry and more freedom to adventure — and that’s really what it’s all about.


