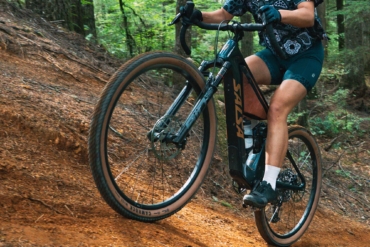
Adventure fanatic Chelsey Magness went on a mission to build the best mountain bike. Here are her favorite tips and components for building your dream ride.
As a small female mountain biker (I’m 5’1″ on a “tall” day), I’ve always had to tear apart my stock bike immediately after receiving it. Before even getting on it for the first time, I switch out the handlebars, stem, and cranks to make it rideable.
And while the industry is getting better about offering more sizing options, most brands don’t offer high-end builds in XS frames, let alone a custom build option from start to finish.
After spending so much time and money switching out components over the years, I started to wonder, “Is it possible to build my own dream bike from scratch?”
“Sure it is,” said my bike geek husband and race partner. “It just takes time, patience, and some back-and-forth with all the companies to make sure it all fits together.” That was enough of a statement for me; I was up for the challenge.
In the weeks that followed, I did a ton of research, learned a lot, and made many new friends. To make it easier for others who wish to do the same, below is a brief list of tips and tricks along with a list of the components I decided to go with. And yes, they will work with all sizes of riders!
Building the Best Mountain Bike
Do your homework.
It can be overwhelming to dive into this world of components. My advice is to start with one or two parts at a time. For example, one day I researched just brake options — calipers, rotors, levers, and mounting (center-lock versus six-bolt) — and made a list of all the pros and cons.
The next day, I tackled wheels and hubs. On days when I was intimidated, I looked at the “contact” bits — pedals, grips, and tires — which were more familiar because they’re the ways a rider constantly interacts with their bike.
Piecing it all out like this prevented me from getting bogged down with all the choices and opinions out there. Instead, I was able to learn a ton about each component and all the brands and options available.
Develop constraints.
This was perhaps the most important for me, especially after learning how many amazing options were available.
To narrow down the choices, I had to decide almost exactly what made something my “dream bike” and write it down. Then, as I started to shop for components, I could instantly eliminate ones (even if they were really cool or unique) that didn’t fit my bike.
I wanted to build a bike that could do everything I like — hold its own on rowdy enduro-style descents, feel at home racing XC against the local pros, and be light enough to carry over mountains in epic adventure races.

Here was my list of constraints:
- 29er carbon full-suspension trail bike
- Minimum of 120mm suspension travel front and rear
- Dropper post
- Sub 24-lb final weight
- 1×12 drivetrain with 165mm cranks (for my short legs)
- Wheels with a bomber crash replacement program
- Budget of $7,000
If you have questions, call up the company.
After doing my homework, more often than not I had even more questions. Instead of bombarding my husband, I started just calling up the bike companies and asking them. Before I called for the first time, I thought that there was no way I would actually get a human on the other line. But I did every single time!
Even big companies like Shimano and SRAM picked up the phone and were happy to talk bikes with me. It was heartwarming to talk to people loved their job, loved talking bikes, and were excited to help me.
Expect some back-and-forth when mixing components.
One of the joys of doing this was I didn’t have to choose one big brand for the entire bike. You can pick two different brands of wheels, a more aggressive front brake than the rear, and non-standard crankset length. But you do need to make sure that it will all play nice together.
In general, it’s a good idea to stay within one brand for your drivetrain (a Shimano shifter doesn’t work with a SRAM derailleur), so make sure you call the parts dealer. But if it meets your needs, feel free to mix and match as much as necessary.
I was even able to change the riding geometry of my frame by choosing a 120mm fork instead of the stock 130mm. This saved weight and got me closer to the XC body position I’m used to after years of racing.
Pick a good bike mechanic.
This one is crucial if you’re not a bike mechanic yourself (and perhaps even if you are one). Lucky for me, my next-door neighbor, Drew Barbar, happens to be an amazing bike mechanic with a shop set up in his garage.
He knew all about my goals, what kind of rider I was, and what I wanted out of my bike. And it showed every time he worked on my bike. He knew all the ins and outs of putting it together and even gave me some suggestions on what to get.
My Dream Bike
Below are a few of the specifics of what my dream bike is made of. And while these components are geared for my small size and varied, aggressive riding, the fun of customizing is that you can build a bike for any style of riding. (If you’re building a dream bike, I’d love to hear about it in the comments below.)
Ellsworth Epiphany Frame: $3,000

I started with my favorite Ellsworth Epiphany frame and built it from there. The Ellsworth suspension design is one I’ve trusted and raced hard on for several years. And the new crop of frames strikes a great balance between light weight, durability, and a geometry that fits my rowdy cross-country-focused style.
But I wanted a “one-quiver” bike that could also handle some rougher stuff, and the 120mm travel felt better all around than some of the totally purpose-built XC frames that I considered. The Ellsworth rear suspension is a four-bar linkage design that separates the pedal forces from the terrain input, which results in a great, efficient, race-worthy bike that can take hits in stride.
M7 Enve Mountain 35mm Stem: $280
Short stems are a necessity for me to make the cockpit fit, and most stock stems (while they’re getting shorter) are too long. Enve makes some of the lightest, strongest, and sexiest carbon components out there, backed by one of the best guarantees in the business.
Fall Line 9.8 75 x 275mm Dropper Post: $399
I almost gave up on the dream of having a dropper just due to weight. But this beauty is an XC racer’s dream. It’s 75mm infinite-adjustable travel is more than enough for my riding style but makes hairy descents much more stable.
And the brand’s options for different seat post lengths meant I wasn’t paying for any extra (both in terms of dollars and grams). Buttery-smooth action is facilitated by three purpose-built remotes, so I was able to dial everything in — all at less than 400 g!
Shimano XTR 12-Speed (10-45 cassette)
A longtime SRAM Eagle rider, I was tempted to return to Shimano for one simple reason — gear range. But not in the way you might think. I wasn’t tempted by the new 10-51 rear cassette (one tooth bigger than Eagle’s 10-50), but by the more reasonable 10-45 cassette.
As a strong climber, I’d always found that last 50-tooth ring on the Eagle to be a bit too much torque. But I often needed a bit more than the top (42-tooth) on an 11-speed cassette.
The Shimano XTR’s 10-45 fit perfectly. Furthermore, the cranks are available in a 165mm length, which fits my proportions much better than the 175mm cranks stocked on most high-end bikes.
Enve M525 29 Wheels: $2,100
Designed featherweight for race day but strong enough for daily riding, the M525 is an ultra-stiff 1,350g carbon wheelset with no rider weight limit and a “lifetime incident replacement” program.
I didn’t look much further once I learned about that last bit. Destroy my wheel in a crash? Replaced at no cost. Drive my roof-mounted bike into a garage (oops)? Replaced at no cost. Seriously?! Yep. Worth every last penny.
FOX 120mm SC 34 Fork: $959
The new 120mm travel step-cast fork from FOX blurs the line between cross-country and trail. With a weight closer to what you’d expect on a 100mm-travel hardtail and performance closer to enduro, this fork was a pivotal choice in allowing me to build a bike that really can do it all.
Ergon GA3 Grips ($30) & Women’s SM Saddle ($70)
Grips and saddle are a rider’s primary contact points with their bike, and arguably two of the most overlooked bits. But they are so personal and can ruin an otherwise magical bike if they’re not enjoyable. I was prepared to go through several grips and saddles in my search for perfection.
But a conversation with Ergon about my small hand size, riding style, and preferred ride length (as long as possible) convinced me to give these two a try. And it was love at first ride. The brand’s site does a great job of explaining the subtle details of its ergonomic designs if you want to know more.
Crank Brothers Eggbeater 11 Pedals: $450
I know it might seem crazy to spend this much on pedals, but they are so light, so easy to clip into, have variable float, and are gold! How could I resist?
And they have a 200-pound rider weight limit, so I’ll never see either of my bigger hoss teammates sporting the same pedal bling.
Have you built your dream bike? Tell us all about it in the comments below.


